23 Paper Christmas Ornaments
There’s something special about handmade paper ornaments that brings warmth to your holiday decorating. They’re budget-friendly, fun to make with kids or friends, and you probably have most of the supplies at home already.
Whether you’re going for delicate snowflakes, colorful chains, or intricate folded designs, paper crafts let you get creative without breaking the bank. Plus, they’re surprisingly sturdy and can last for years if you store them carefully. Grab some scissors, glue, and your favorite paper, and let’s make your tree look amazing this year.
Paper Snowflakes in Various Sizes

Classic paper snowflakes are always a winner, and making them in different sizes creates a beautiful layered effect on your tree. Fold white or light blue paper into triangles, then cut out various shapes along the edges—triangles, circles, and curves all work great.
When you unfold them, you’ll reveal intricate symmetrical patterns. The beauty is that each one turns out unique. Make tiny ones for branch tips and larger ones as statement pieces. Hang them with clear fishing line so they appear to float, or attach them directly to branches with a dab of glue.
Origami Stars
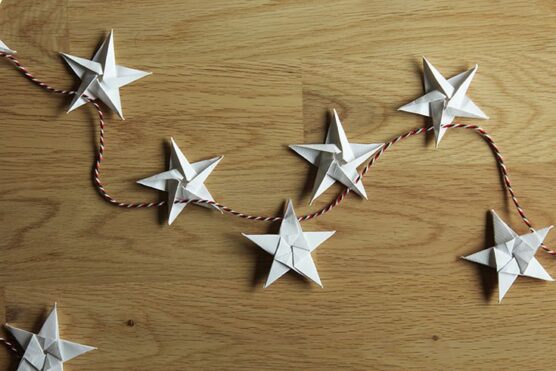
These geometric beauties add a modern touch to traditional holiday decor. You’ll need square paper cut into strips or origami paper to fold these dimensional stars. The most popular style is the five-pointed puffy star that looks almost store-bought when done right. Follow a basic origami star tutorial, creasing each fold sharply for clean lines.
Use metallic or patterned scrapbook paper for extra visual interest. They catch the light beautifully and look fantastic in clusters. String several together or let them hang individually at different heights throughout your tree.
Paper Chain Garlands

Remember making these in elementary school? They’re still just as fun and incredibly versatile. Cut paper into strips about an inch wide and four to six inches long. Loop one strip into a circle and glue or staple the ends together, then thread the next strip through before closing it.
Keep going until your chain reaches the length you want. Mix colors for a rainbow effect, stick with traditional red and green, or go monochromatic for a sophisticated look. Drape them around your tree, across mantels, or along doorways for instant festive vibes.
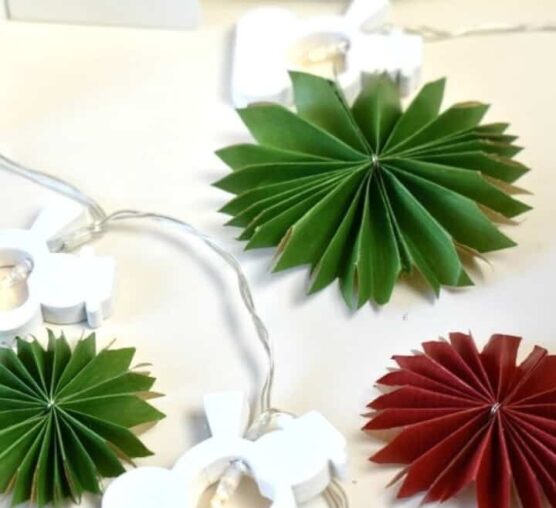
Accordion-Folded Paper Fans

These pleated decorations bring texture and movement to your holiday setup. Take rectangular paper and fold it back and forth like a fan, making each pleat about half an inch wide. Once folded, pinch the center and fan out both sides, then secure the middle with string or a small clip.
You can cut decorative edges before folding for added detail. Attach a loop of ribbon to hang them, or glue several fans together in a circle to create a full medallion. They work beautifully in jewel tones or classic Christmas colors.
Paper Angels with Doily Wings
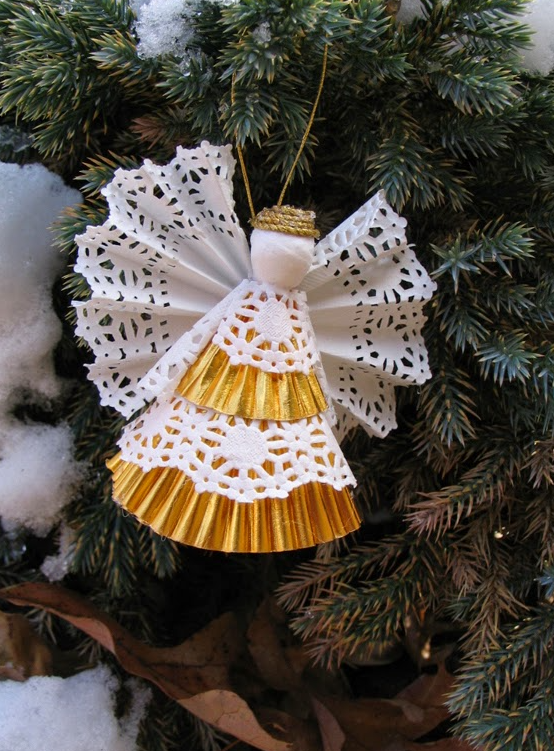
These delicate angels bring an elegant, vintage feel to your tree. Use paper doilies for the wings—they already have that intricate lacy look. For the body, roll a cone from cardstock or decorative paper, and add a small wooden bead or paper sphere for the head.
Glue the doily wings to the back of the cone body, spreading them out gracefully. Draw a simple face or leave the head plain, and add a halo made from gold pipe cleaner or paper. They’re sweet hanging ornaments and also make lovely tree toppers in larger sizes.
Quilled Paper Snowflakes
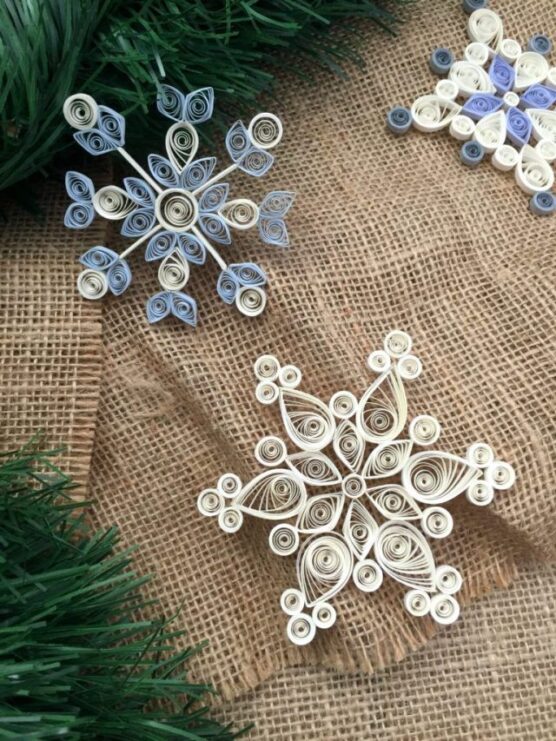
Quilling takes your snowflakes to the next level with beautiful curled designs. Cut thin strips of white, silver, or light blue paper, then roll them around a toothpick or quilling tool to create tight coils. Pinch the coils into teardrop shapes, marquise shapes, or leave them round.
Arrange these shapes into snowflake patterns—usually with six points radiating from the center—and glue them together. The dimensional quality makes them really stand out. These take a bit more time and patience, but the results are absolutely stunning and look almost professional.
Paper Rosette Ornaments
These circular decorations have a fancy, formal appearance that elevates any tree. Make them by accordion-folding long strips of paper, then bringing the ends together to form a circle, creating a rosette effect. Glue a decorative button, smaller paper circle, or sparkly embellishment in the center to hide where the ends meet.
You can make them in different sizes and layer two or three rosettes together for more dimension. Use patterned scrapbook paper, sheet music, or even pages from old books for an interesting vintage aesthetic.
Origami Christmas Trees

These little folded trees are adorable and easier to make than they look. Start with green origami paper or any square paper in your favorite shade. The basic design involves folding the paper into a triangle, then making smaller accordion folds to create the layered branch effect.
You can add a tiny paper star on top or leave it simple. Make several in different sizes and hang them at various heights, or create a whole forest of them. They’re also cute strung together as a garland or used as gift tags.
Paper Cone Trees
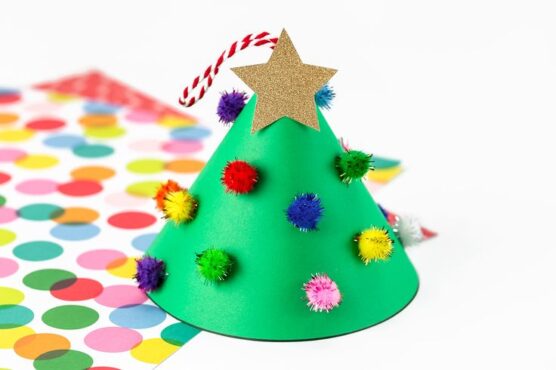
Simple but effective, these cone-shaped trees have a clean, modern look. Cut a semicircle from green cardstock or patterned paper, then roll it into a cone shape and secure with glue or tape. The tighter you roll it, the narrower your tree will be.
Decorate the cone with small paper circles as ornaments, tiny paper stars, or leave it plain for a minimalist vibe. You can add glitter along the edges or use embossed paper for texture. Attach a string loop at the top, and they’re ready to hang.
Rolled Paper Pinwheels

These bring playful movement and color to your holiday decorations. Cut two squares of paper, slice from each corner toward the center (stopping about an inch from the middle), then fold every other point into the center and secure with a brad or glue. The pinwheel shape creates visual interest with its geometric design.
Use double-sided paper or glue two patterned papers back-to-back for a reversible look. Attach them to the tree with the brad facing out, adding a dimensional quality. Kids especially love helping with these because they’re straightforward and fun.
Paper Strip Balls

These spherical ornaments look complex but come together pretty easily. Cut multiple strips of paper the same length—usually eight to twelve strips work well. Stack them together and punch holes through both ends. Thread a string or brad through both holes to connect all the strips at their ends.
Gently pull the strips apart, arranging them evenly in all directions to form a sphere. The result is an open, airy ball ornament with a modern sculptural quality. Try using gradient colors or metallic paper for extra impact.
Origami Cranes
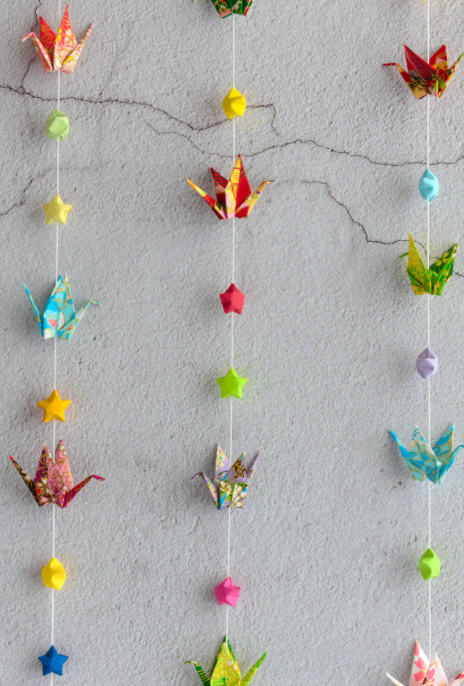
Traditional origami cranes bring elegance and cultural significance to your tree. These require a bit more folding skill, but there are plenty of tutorials available online. Use origami paper or any thin, square paper that holds a crease well. The finished cranes have graceful wings and long tail feathers that look beautiful hanging at different lengths.
String several cranes together to create a mobile-style decoration, or let them perch individually on branches. Metallic or patterned paper makes them feel more festive than plain white.
Paper Medallion Ornaments

These layered circular decorations create depth and visual interest wherever you hang them. Make several paper rosettes in decreasing sizes, then stack and glue them together, aligning the centers. The layering creates a dimensional effect with each rosette’s pleats visible. Use different colors or patterns for each layer, or stick with an ombre effect using shades of the same color.
Add a button, sequin, or paper circle in the very center as a focal point. They photograph beautifully and look professionally made when you take your time with the assembly.
Folded Paper Stars

Different from origami stars, these use simple folding techniques for quick results. Cut out a star shape from cardstock, then score and fold along lines from each point to the center, creating dimension. The folds make the star pop up rather than lying flat. You can also try the Scandinavian-style folded stars using woven paper strips.
Decorate with glitter, leave them plain, or use shimmery cardstock. They catch light beautifully and work well in both large and small sizes scattered throughout your tree or windows.
Paper Honeycomb Balls

These expandable decorations create impressive volume from flat paper. You’ll need multiple identical circles of tissue paper or thin craft paper. Apply glue in a specific pattern on each circle, then stack them together. Once dry, carefully pull apart to reveal the honeycomb structure inside.
They expand into perfect spheres that look much more complicated than they are. Available in craft stores as kits, or you can make them yourself with patience. Hang them at different heights with ribbon for a floating effect that fills empty spaces beautifully.
Kirigami Ornaments

Kirigami combines origami folding with paper cutting for intricate designs. Unlike basic snowflakes, kirigami ornaments can be three-dimensional structures that pop up or fold into architectural shapes. Start with square paper, follow folding instructions for your chosen design, then carefully cut specific lines.
When unfolded or opened, the cuts create patterns and shapes that would be impossible with folding alone. These work especially well with metallic or double-sided paper. They’re conversation starters because of their complexity and unique appearance on the tree.
Paper Lanterns

These cylindrical or round decorations add soft, structured shapes to your display. Make simple cylinder lanterns by cutting vertical slits in a folded piece of paper, then unfolding and rolling it into a tube shape. Or try Chinese-style round lanterns using paper strips or accordion-folded paper formed into spheres. Add tassels at the bottom for an authentic touch.
Use red and gold paper for traditional Asian styling, or winter whites and silvers for a Christmas theme. Battery-operated tea lights can go inside larger versions for a gentle glow.
Origami Gift Boxes

Tiny folded boxes make charming ornaments and can actually hold small treats. The classic masu box is perfect for this—fold square paper following a specific pattern, and you’ll end up with a cute box with or without a lid. Fill them with candy, small notes, or leave them empty for a clean look.
Use festive patterned paper or solid colors with decorative edges. Thread ribbon through the box to create a hanging loop. These are especially fun on Christmas Eve when each box can hold a small surprise for family members.
Paper Feather Ornaments

These delicate decorations bring an unexpected natural element to your tree. Cut feather shapes from cardstock or heavy paper, then make small diagonal cuts along both sides to create the feathery fringe. Curl the fringe slightly using the edge of scissors or a pencil for added realism.
Layer different colored feathers together or keep them monochromatic. Add sparkle with metallic paint along the edges or a light dusting of glitter. Attach a thin ribbon loop at the top for hanging. They flutter slightly with air movement, adding gentle motion to your display.
Paper Icicles

These flowing decorations capture the look of real icicles with simple techniques. Cut long, narrow triangles from white, silver, or iridescent paper. Use the edge of scissors to curl the paper by running the blade along the length while pulling gently. The paper will spiral and curl naturally.
You can also cut thin strips and curl them tightly around a pencil, then release for springy spirals. Hang these at varying lengths from branches to mimic how real icicles form. Metallic or holographic paper catches the light beautifully, creating a frosty, winter wonderland effect.
Paper Fortune Cookie Ornaments
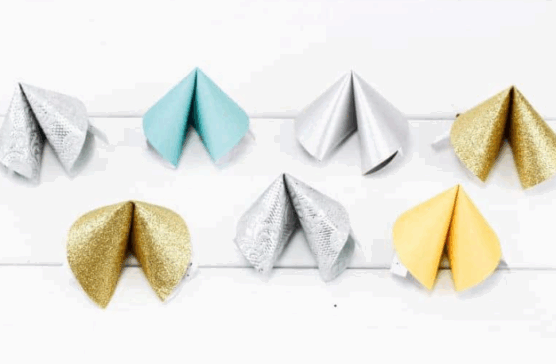
These little folded surprises are adorable and can hold secret messages inside. Cut circles from cardstock, fold them in half, then gently bend the half-circle into the classic fortune cookie shape, bringing the ends together. Secure with a small dab of glue. Before sealing completely, tuck a small strip of paper inside with a holiday message, wish, or memory.
The shape is distinctive and adds whimsy to your tree. Use patterned paper or paint them gold for an elegant look. They’re also great conversation starters when guests realize they contain hidden messages.
Woven Paper Hearts

These Scandinavian-style hearts are both beautiful and functional as small holders. Cut two identical shapes (usually elongated ovals with straight tops), then make vertical cuts from the curved bottom up toward the top, stopping before you reach the straight edge. Weave the two pieces together, alternating strips over and under.
The result is a charming heart basket with a handle. Use contrasting colors or patterns for visual interest. Fill them with tiny candies or leave them empty. They represent the handmade tradition of Nordic Christmas celebrations and bring warmth to your decorating.
Paper Spiral Christmas Trees

These dimensional trees start flat but become sculptural when assembled. Draw or print a spiral line in a Christmas tree shape, with the spiral starting at the outer edge and working toward the center. Cut along the spiral line, then pull up from the center point—the spiral naturally forms a three-dimensional tree shape.
The continuous line creates interesting negative space and shadow. Use green cardstock and add tiny dots of color for ornaments, or try metallic paper for shimmer. They’re surprisingly stable once formed and look great hanging or standing on flat surfaces.