19+ Fun Snowman Crafts to Make This Winter
Winter is the perfect time to get crafty with snowman projects! Whether you’re looking for activities to do with kids, decorations for your home, or handmade gifts for friends and family, these snowman crafts are sure to bring some frosty fun to your day.
From simple projects using materials you already have at home to more elaborate creations, there’s something here for every skill level. Grab your glue gun, gather your supplies, and let’s build some adorable snowmen that won’t melt when the temperature rises!
1. Sock Snowmen with Buttons and Felt Accessories
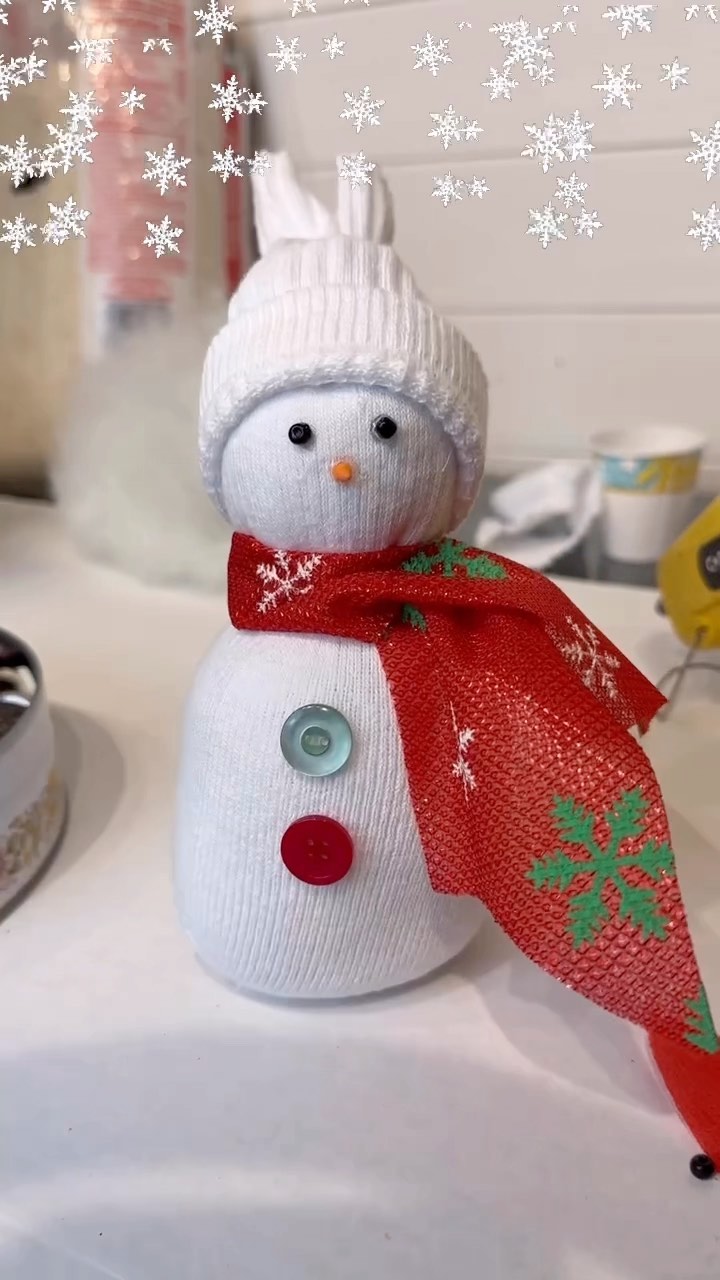
Grab a white sock and fill it with rice or stuffing to create the body. Tie off sections with rubber bands to make the head and body segments. Add buttons down the front by gluing or sewing them on. Cut a small strip of felt or fabric for a scarf and wrap it around the neck area. Use another sock or felt piece to make a tiny hat for the top. Draw or glue on eyes and a carrot nose made from orange felt. These chunky little snowmen look super cute sitting on shelves or windowsills, and kids love helping stuff the socks.
2. Mason Jar Snowman Luminaries with Painted Faces
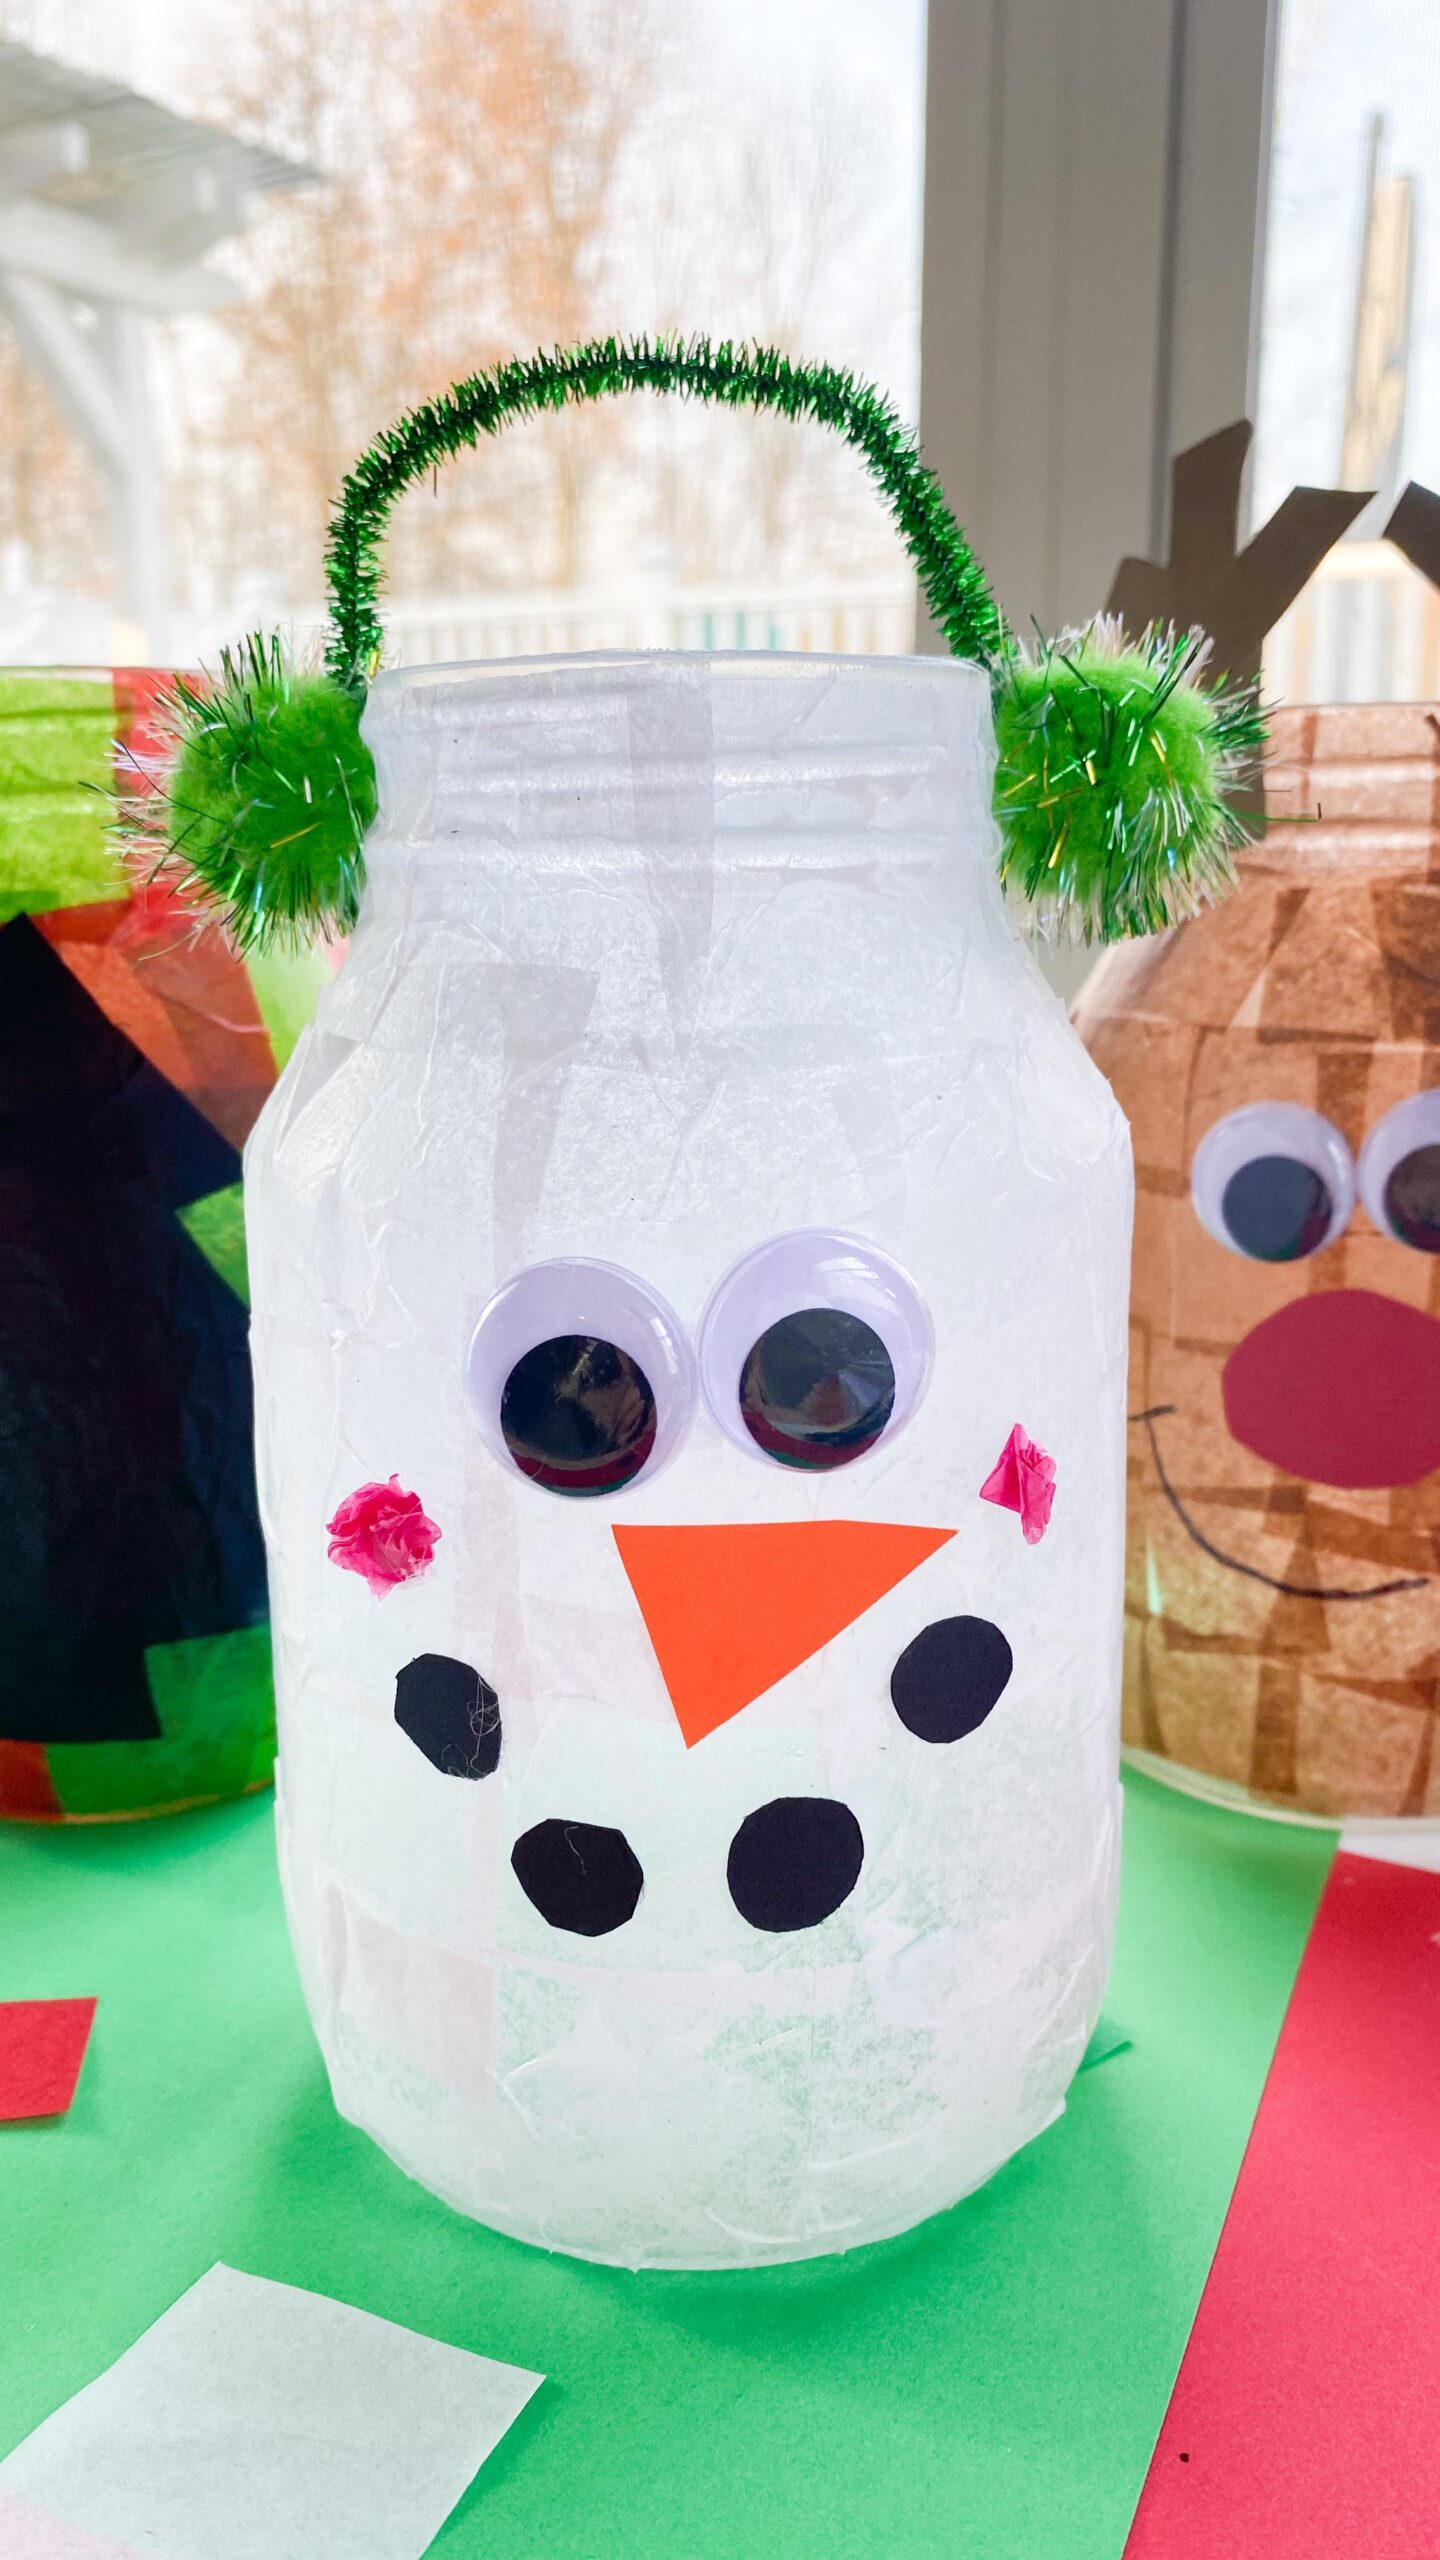
Paint the outside of a mason jar with white acrylic paint and let it dry completely. Use black paint or a marker to add coal eyes and a smile. Add an orange painted triangle or a small piece of orange paper for the nose. Wrap a ribbon or strip of fabric around the rim of the jar to make a scarf. Place a battery-operated tea light or string lights inside the jar. The painted glass gives off a soft, cozy glow that’s perfect for winter evenings. Line several along a mantel or use them as table centerpieces for holiday gatherings.
3. Paper Plate Snowman Garland
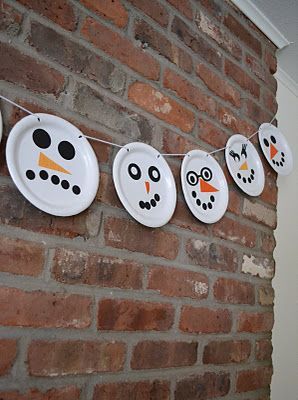
Cut paper plates in half or use them whole, depending on how big you want your garland. Paint the plates white if they aren’t already, then let them dry. Draw snowman faces on each plate with markers, adding different expressions to give each one personality. Glue on paper or felt accessories like hats, scarves, and buttons. Punch holes at the top of each plate and thread string or ribbon through to connect them. Hang your garland across a wall, doorway, or above a fireplace. It’s a great classroom or group activity since everyone can decorate their own snowman.
4. Wine Cork Snowman Ornaments
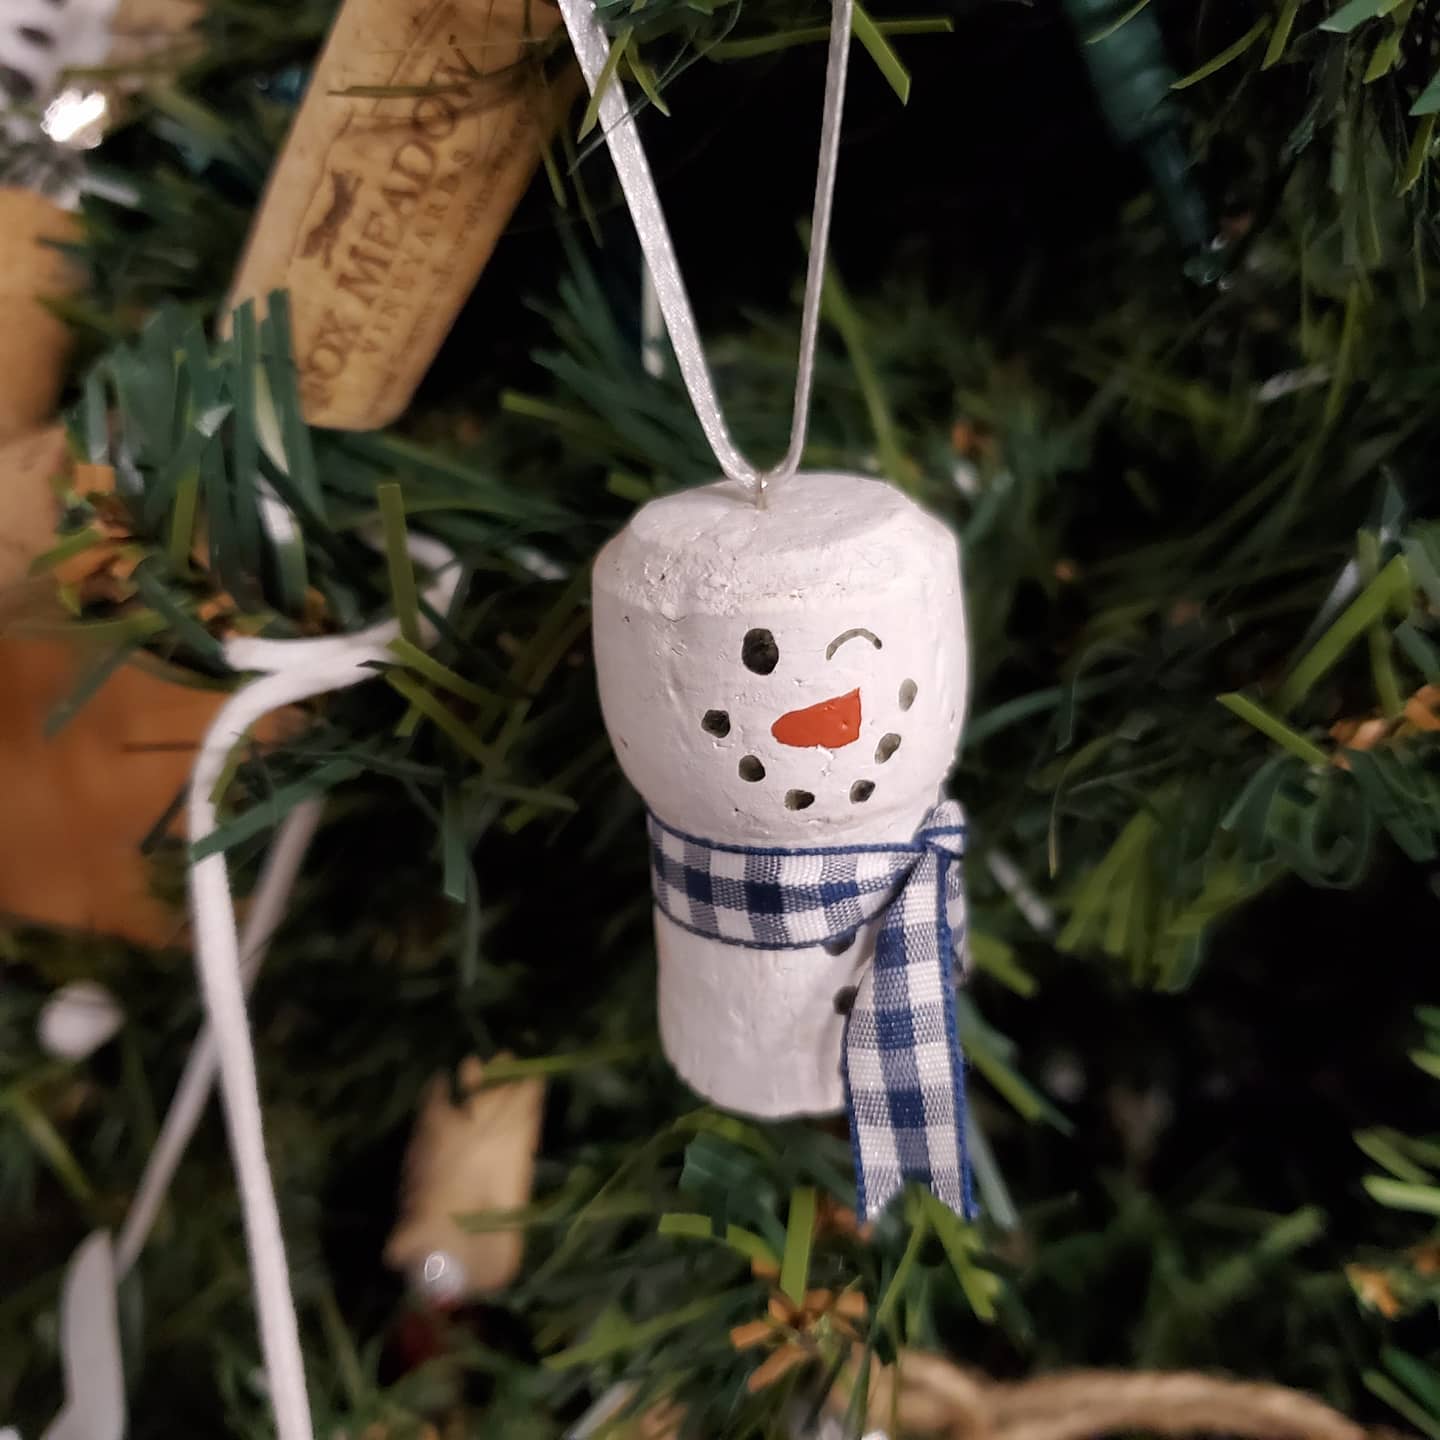
Stack three wine corks vertically and glue them together to form the snowman’s body. Paint the corks white and allow them to dry fully. Use a thin black marker or paint to add facial features and buttons. Wrap a small piece of ribbon, twine, or fabric scrap around the middle cork for a scarf. Make a tiny hat from felt or use a small bottle cap painted in a fun color. Attach a loop of string or ribbon to the top so you can hang it on your tree. These mini ornaments are perfect for wine lovers and make great gift toppers too.
5. Toilet Paper Roll Snowmen
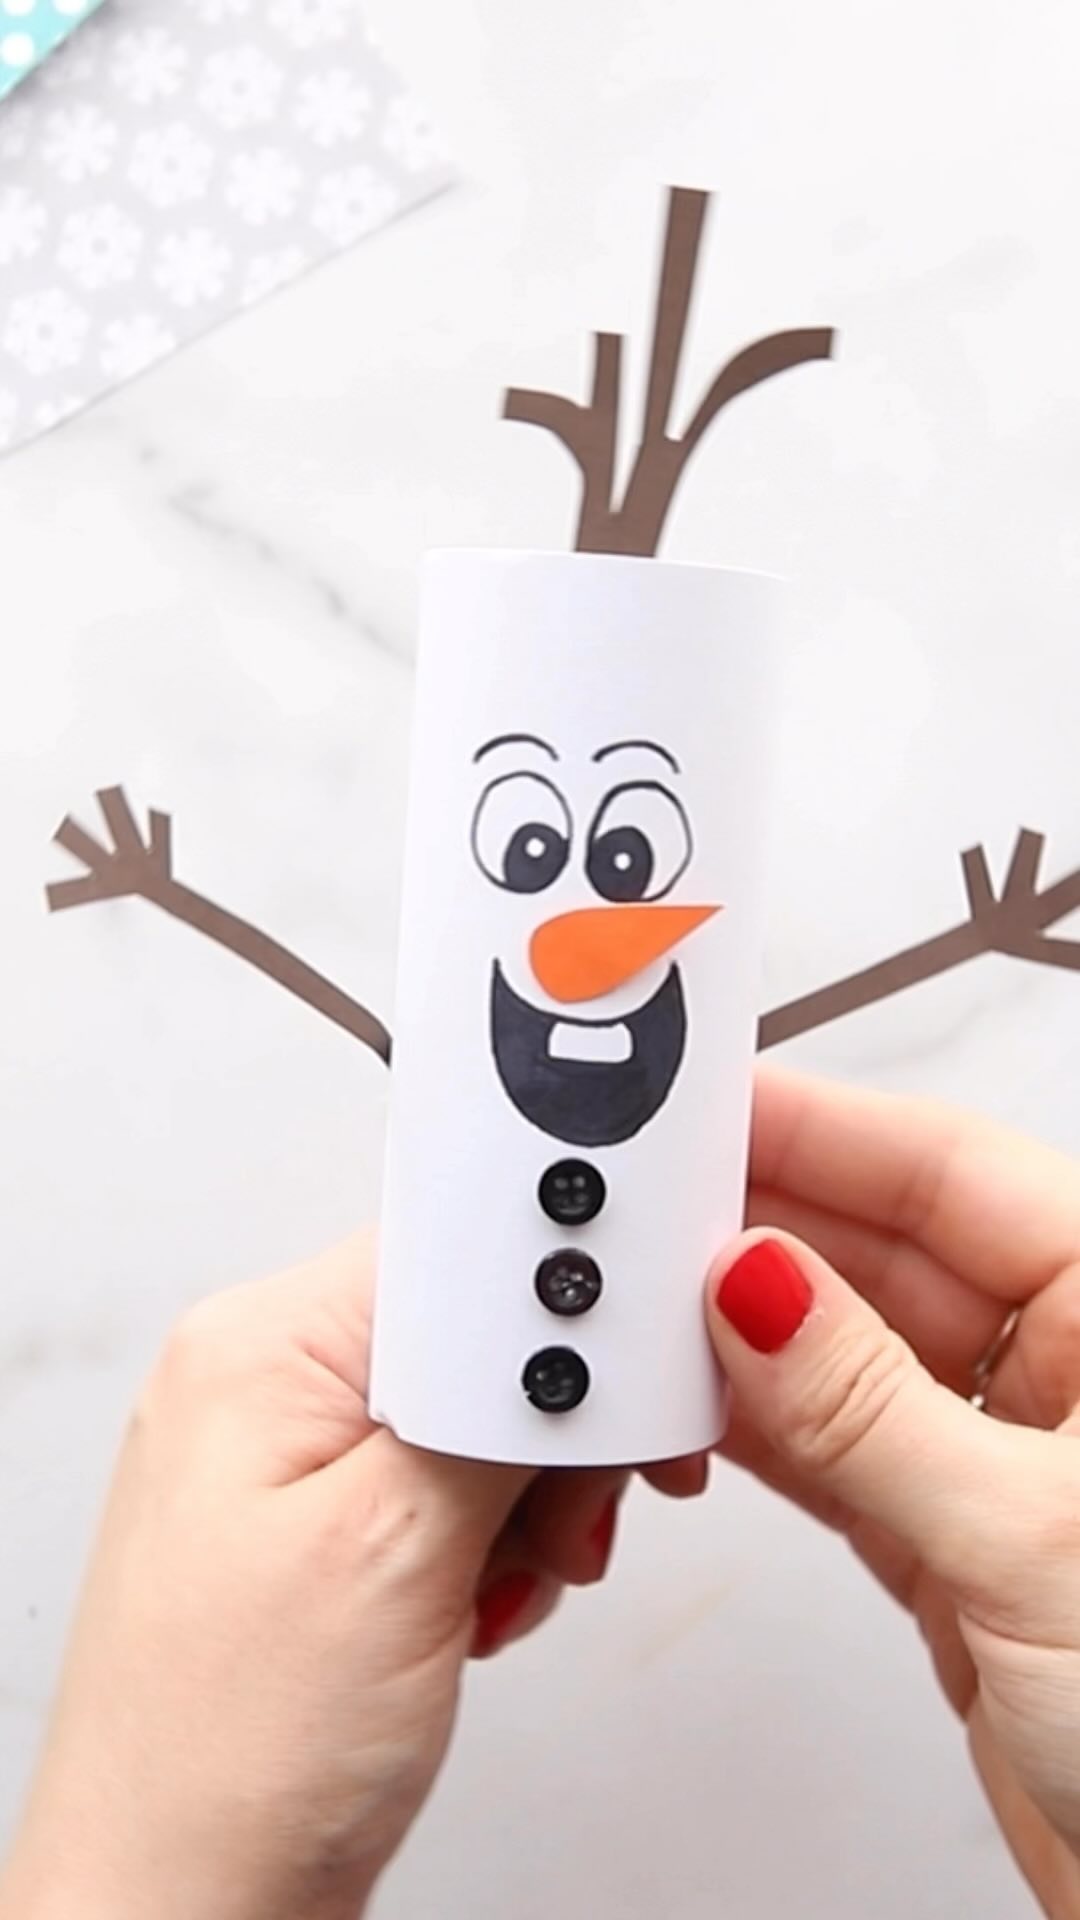
Cover a toilet paper roll with white paint or white paper and let it dry. Draw or paint on a snowman face with black dots for eyes and a smile. Add an orange triangle nose using paint, marker, or paper. You can also add buttons down the front with markers or actual small buttons. For the hat, use black construction paper rolled into a cylinder and glued on top. These are quick to make and use up materials you’d usually recycle anyway.
6. Wooden Log Slice Snowman Decorations
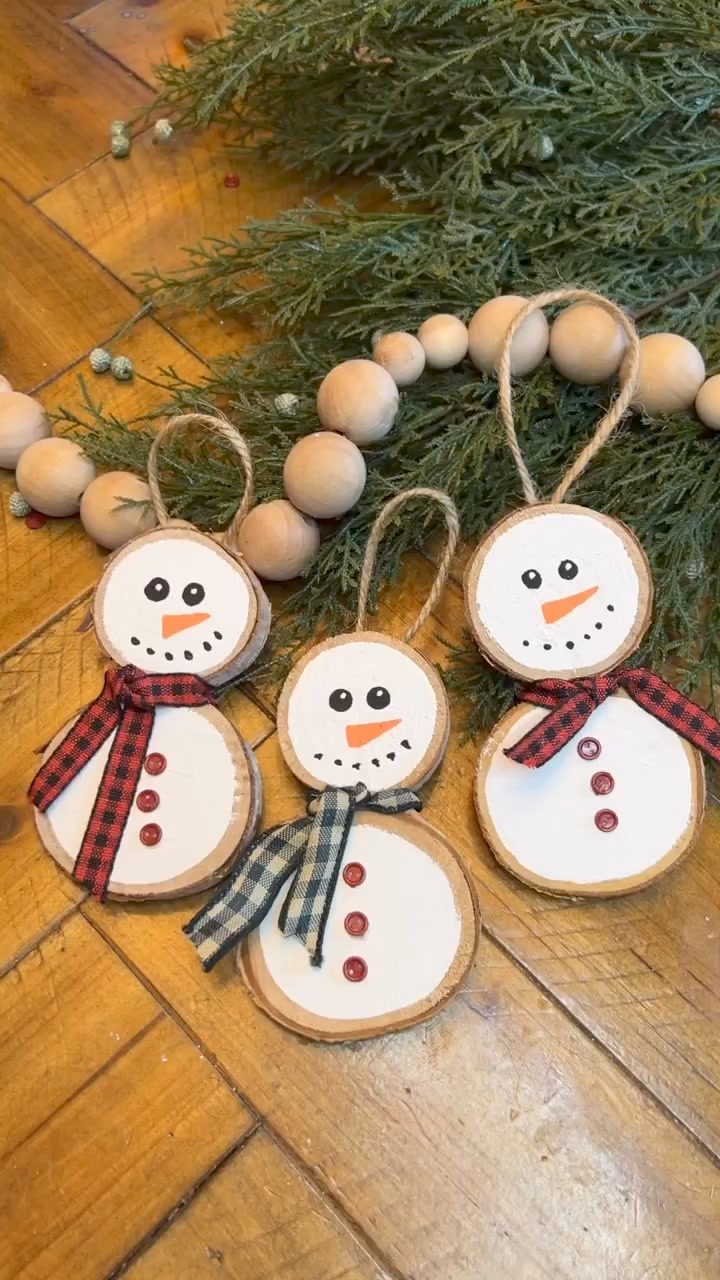
Find or purchase three wooden log slices in graduating sizes. Stack them from largest to smallest and glue them together vertically. Paint the wood white or leave it natural for a rustic look. Add facial features with paint or markers, and don’t forget the carrot nose. Use twigs for arms by drilling small holes in the sides or just gluing them on. Wrap twine or ribbon around the middle slice for a scarf. These rustic snowmen look beautiful displayed on a porch, mantel, or as part of a winter centerpiece with pinecones and greenery.
7. Pom-Pom Snowman Keychains
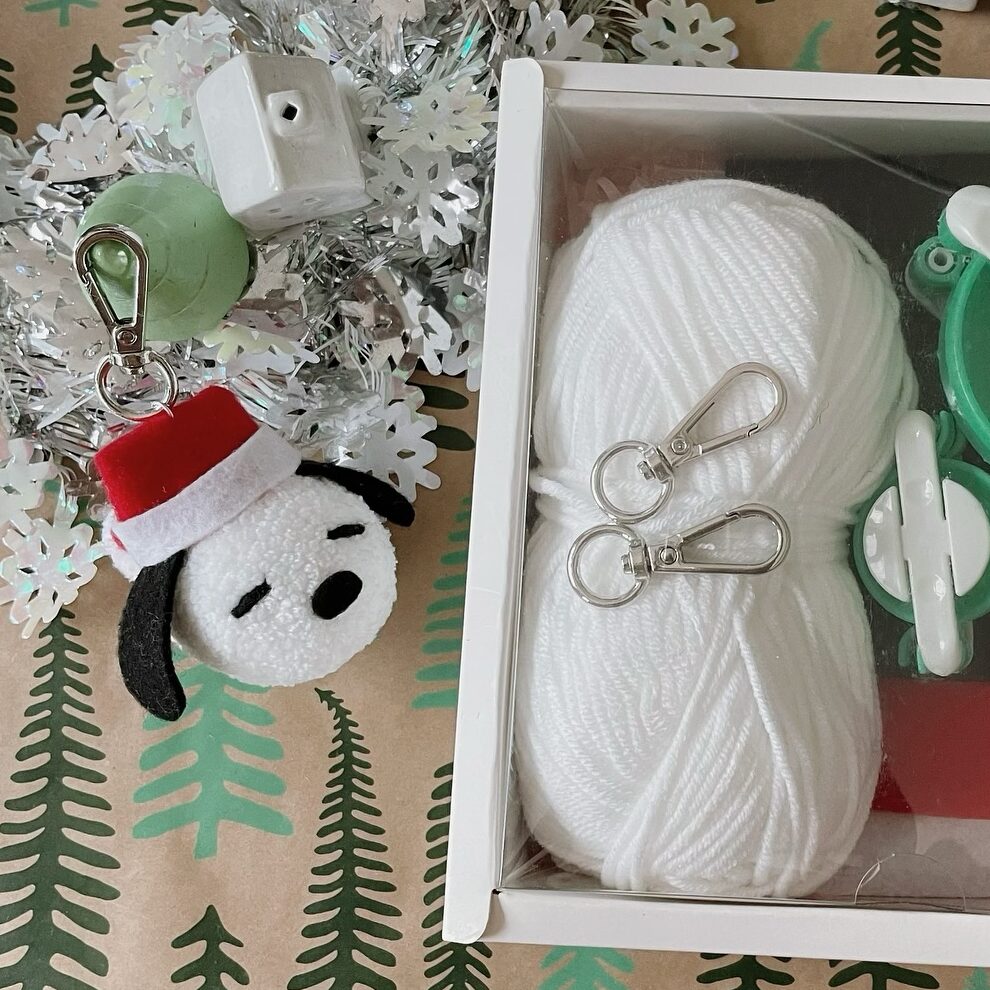
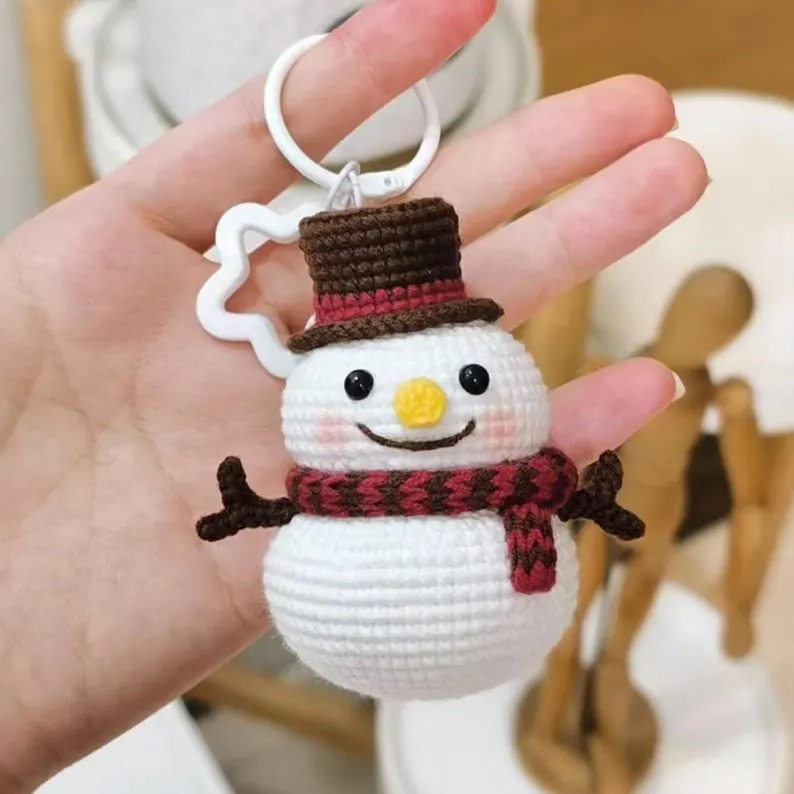
Purchase white pom-poms in two sizes or make your own from yarn. Glue the smaller pom-pom on top of the larger one to create the head and body. Use tiny black beads or draw dots with a marker for the eyes and mouth. Add a tiny orange bead or felt triangle for the nose. Cut a small strip of felt or ribbon to make a miniature scarf. Attach a keychain ring to the top with a small jump ring or by threading it through the pom-pom. These fluffy little snowmen are adorable dangling from backpacks, purses, or keys, and they make sweet handmade gifts.
8. Painted Rock Snowman Paperweights
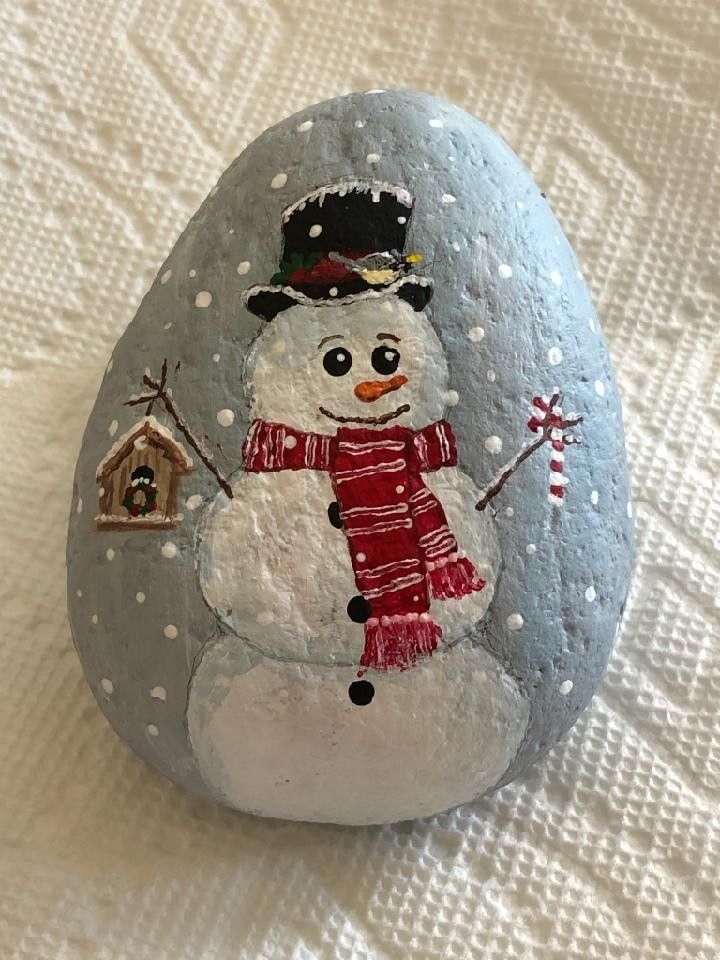
Find smooth, rounded rocks in different sizes at a craft store or outside. Clean them thoroughly and let them dry. Paint the rocks white as your base coat. Once dry, use acrylic paint to add classic snowman features like coal eyes, a carrot nose, and a smile. Paint on a colorful scarf and hat, or add buttons down the middle. Seal your finished snowman with a clear acrylic sealer to protect the paint. These make functional paperweights for desks or just cute decorations. Kids enjoy painting rocks, so this is a fun family activity for a winter afternoon.
9. Styrofoam Ball Stacked Snowmen
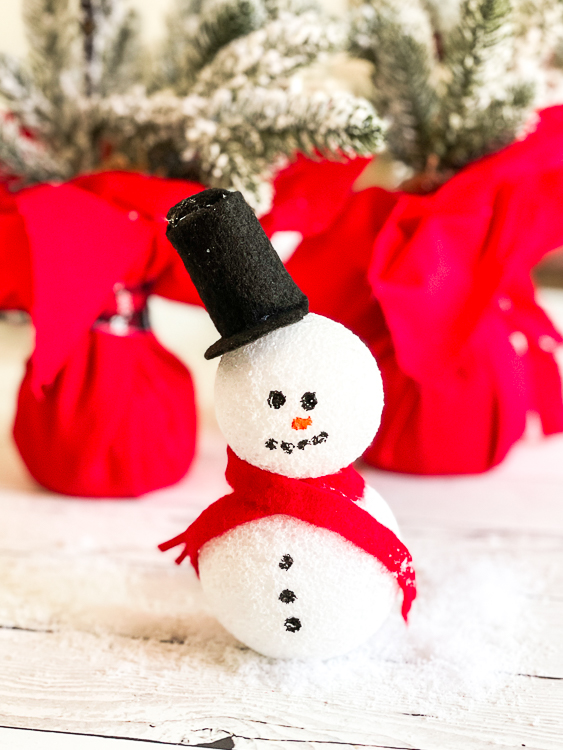
Purchase styrofoam balls in three sizes from a craft store. Stack them with the largest on the bottom and smallest on top, using toothpicks or wooden skewers to hold them together. Paint the balls white if needed or leave them as is. Push in black pins or beads for eyes and buttons. Add a small orange bead or paper cone for the nose. Wrap fabric or ribbon around the neck for a scarf. Use twigs for arms by poking them into the sides. Top with a small hat made from felt or fabric. These classic snowmen can be any size you want and look great on mantels.
10. Handprint Snowman Cards
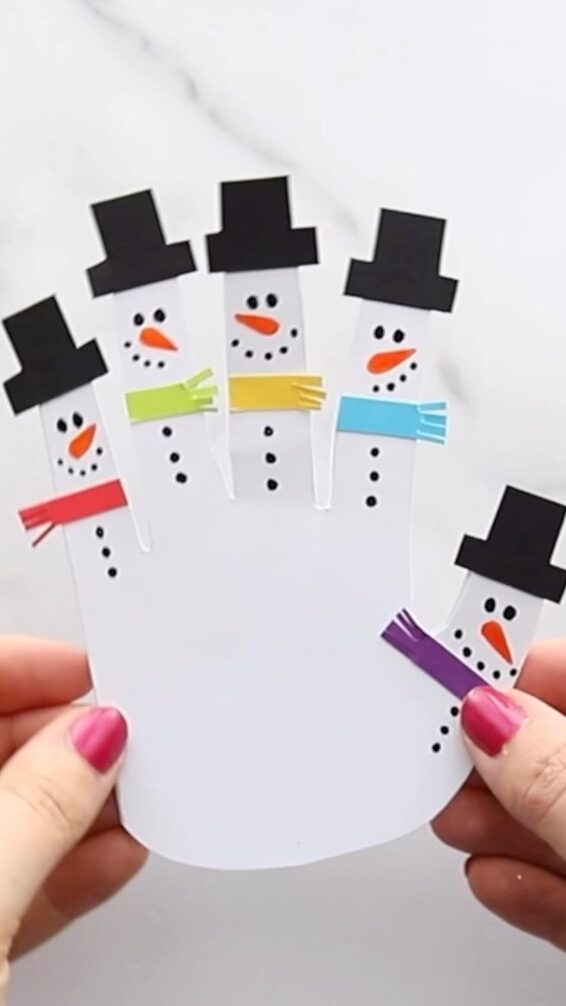
Trace your child’s hand on white paper or cardstock and cut it out. Glue the handprint vertically onto a folded card with the fingers pointing up. The palm becomes the snowman’s body and the fingers become the background or decorative elements. Draw a face on the palm area with markers. Add a hat at the top using black paper and a scarf where the wrist meets the palm. You can decorate the background with snowflakes, falling snow, or winter scenery. Write a message inside the card. These make heartfelt gifts for grandparents or special keepsakes showing how small their hands were.
11. Felt Snowman Door Hangers
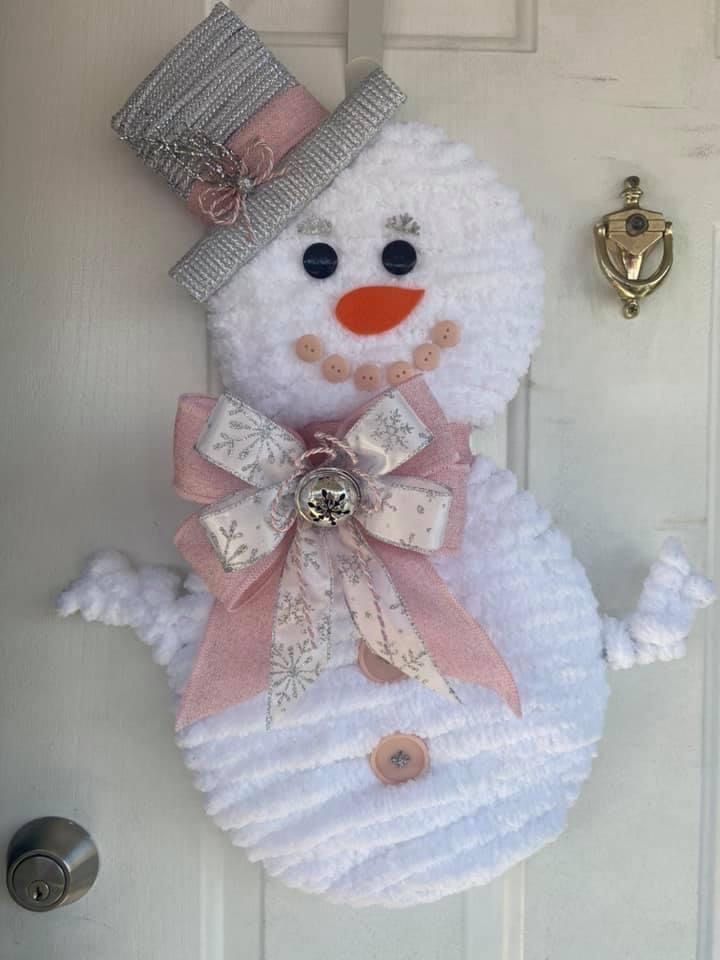
Cut out three white felt circles in graduating sizes and stack them vertically on a larger piece of felt or cardboard backing. Glue everything in place securely. Use black felt to cut out eyes, a mouth, and buttons, then glue them on. Add an orange triangle for the nose and colorful felt strips for a scarf. Cut out a black felt hat and attach it to the top. Punch a hole at the top of the backing and thread ribbon through to create a hanger. These cheerful door decorations welcome guests and add a festive touch to bedroom doors or walls throughout your home.
12. Clay Pot Stacked Snowman Planters
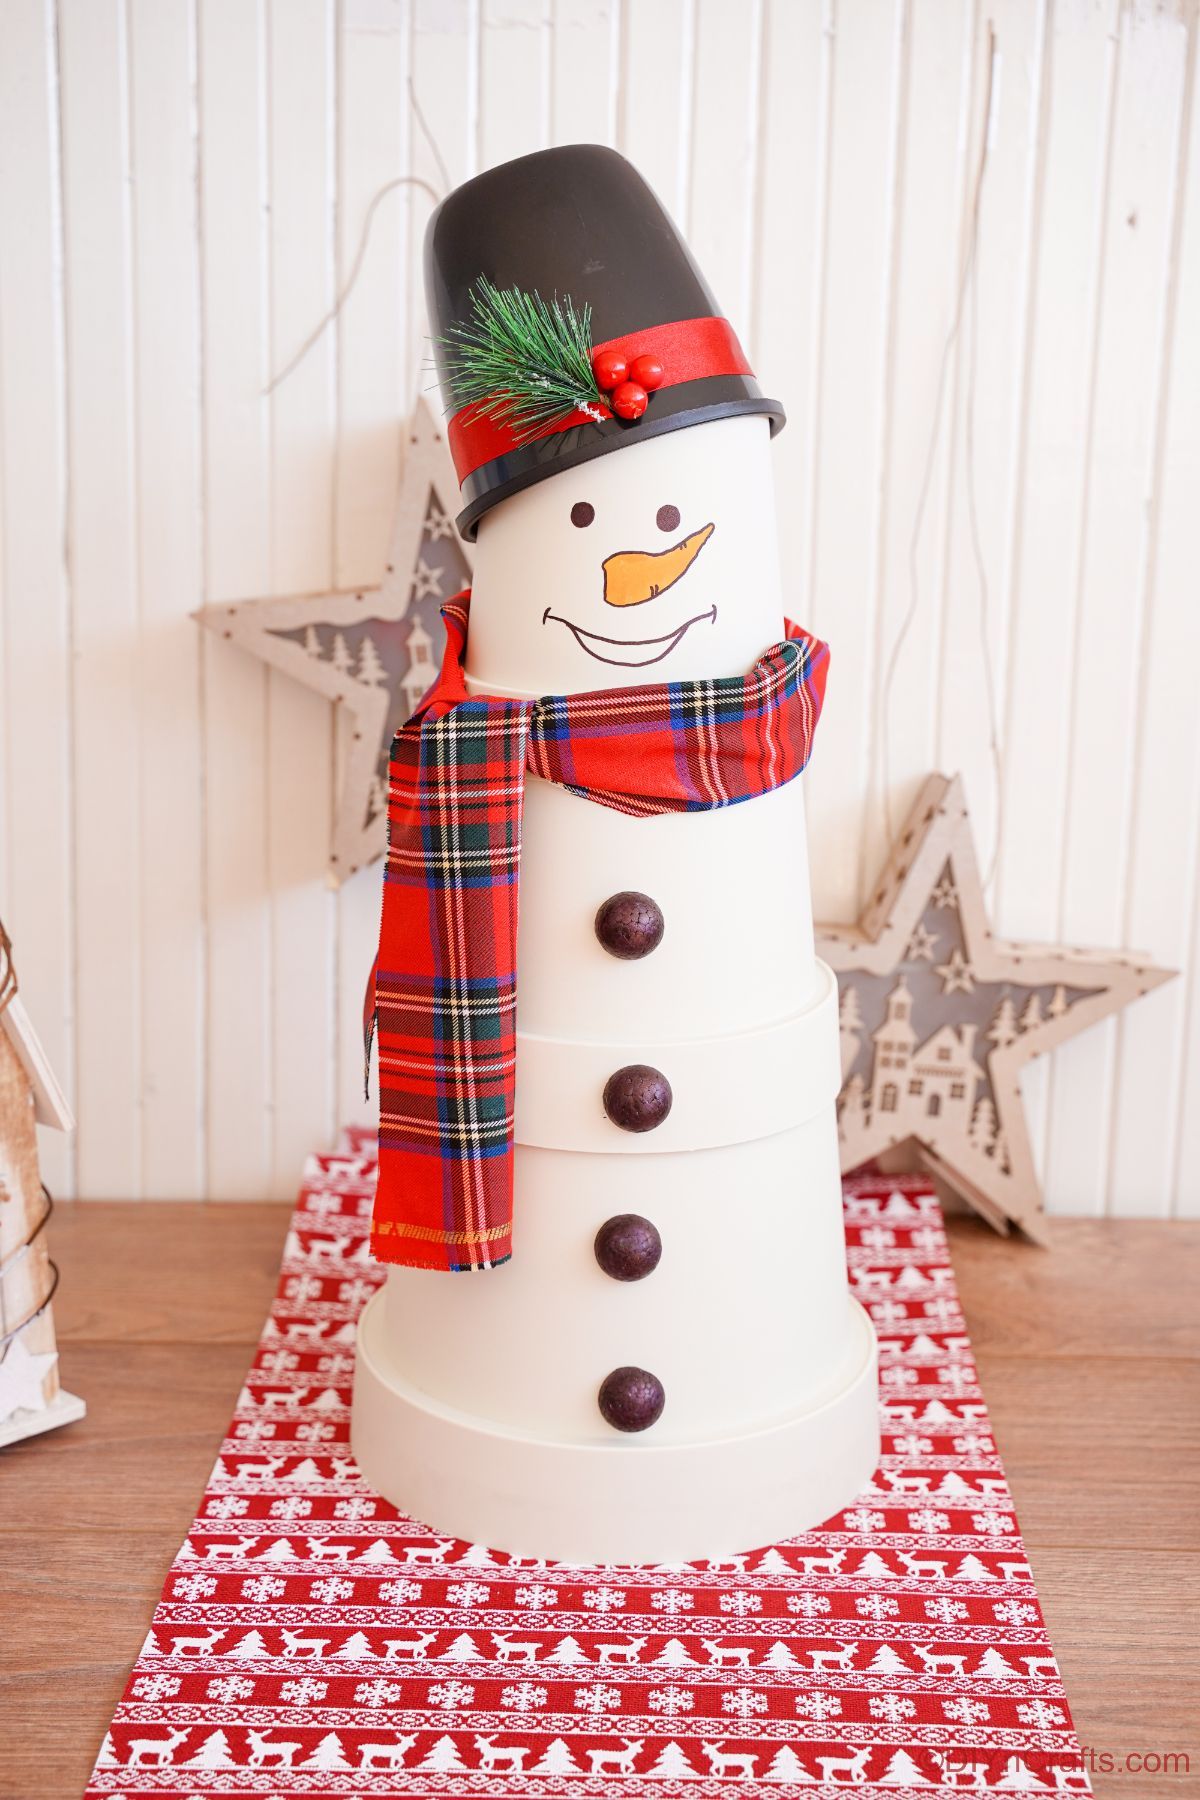
Stack three terra cotta clay pots upside down, graduating from large to small. Glue them together securely with a strong adhesive. Paint all the pots white and let them dry completely. Add a snowman face to the smallest pot with acrylic paint. Paint on a colorful scarf where the pots meet and add buttons down the front. Use twigs or small branches for arms, tucking them between the pots. Top with a small pot or felt hat. You can place these on your porch, use them as actual planters, or just display them as decorative winter figures that bring charm to your space.
13. Melted Snowman Cookies or Cupcakes

Bake sugar cookies or cupcakes according to your favorite recipe. Once cooled, frost them with white icing to create a “melted” puddle effect. Place a large marshmallow on top of each treat to represent the snowman’s head. Use small candies or icing to add facial features on the marshmallow. Add pretzel sticks or small cookies as arms sticking out from the sides. Use small candies for buttons scattered on the white frosting. Add a small candy hat or use chocolate pieces. These adorable treats look like snowmen that melted right on your dessert plate, and they’re as fun to make as they are to eat at winter parties.
14. Glass Jar Snow Globe Snowmen
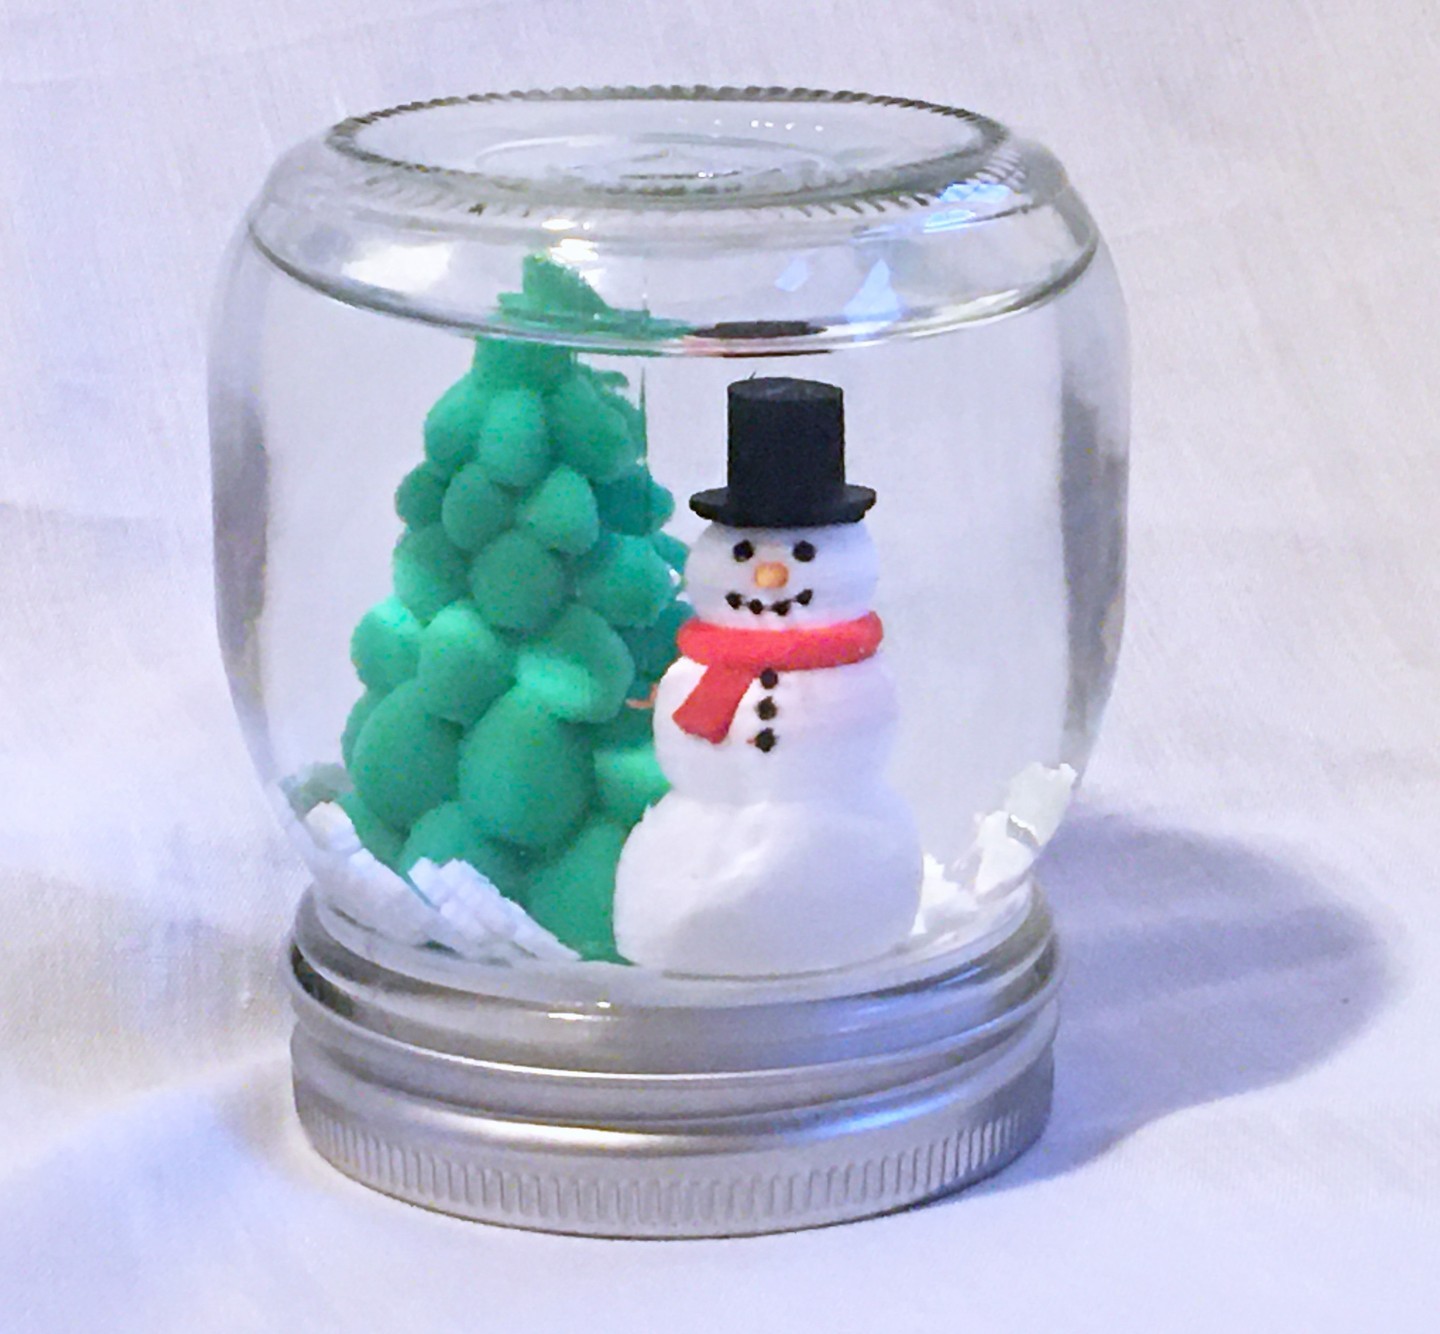
Fill a small glass jar about one-third full with fake snow, white glitter, or epsom salt. Create a tiny snowman using polymer clay, or use a small purchased figurine. Glue the snowman to the inside of the jar lid, making sure it’s secure. Add a drop of glycerin to the jar if you want the snow to fall slowly. Fill the jar with water, leaving a small air gap. Screw the lid on tightly, flipping it so the snowman is inside and upright. Shake your snow globe to watch the snow swirl around your little snowman. Seal the lid with glue if needed to prevent leaks.
15. Cotton Ball Snowman Art
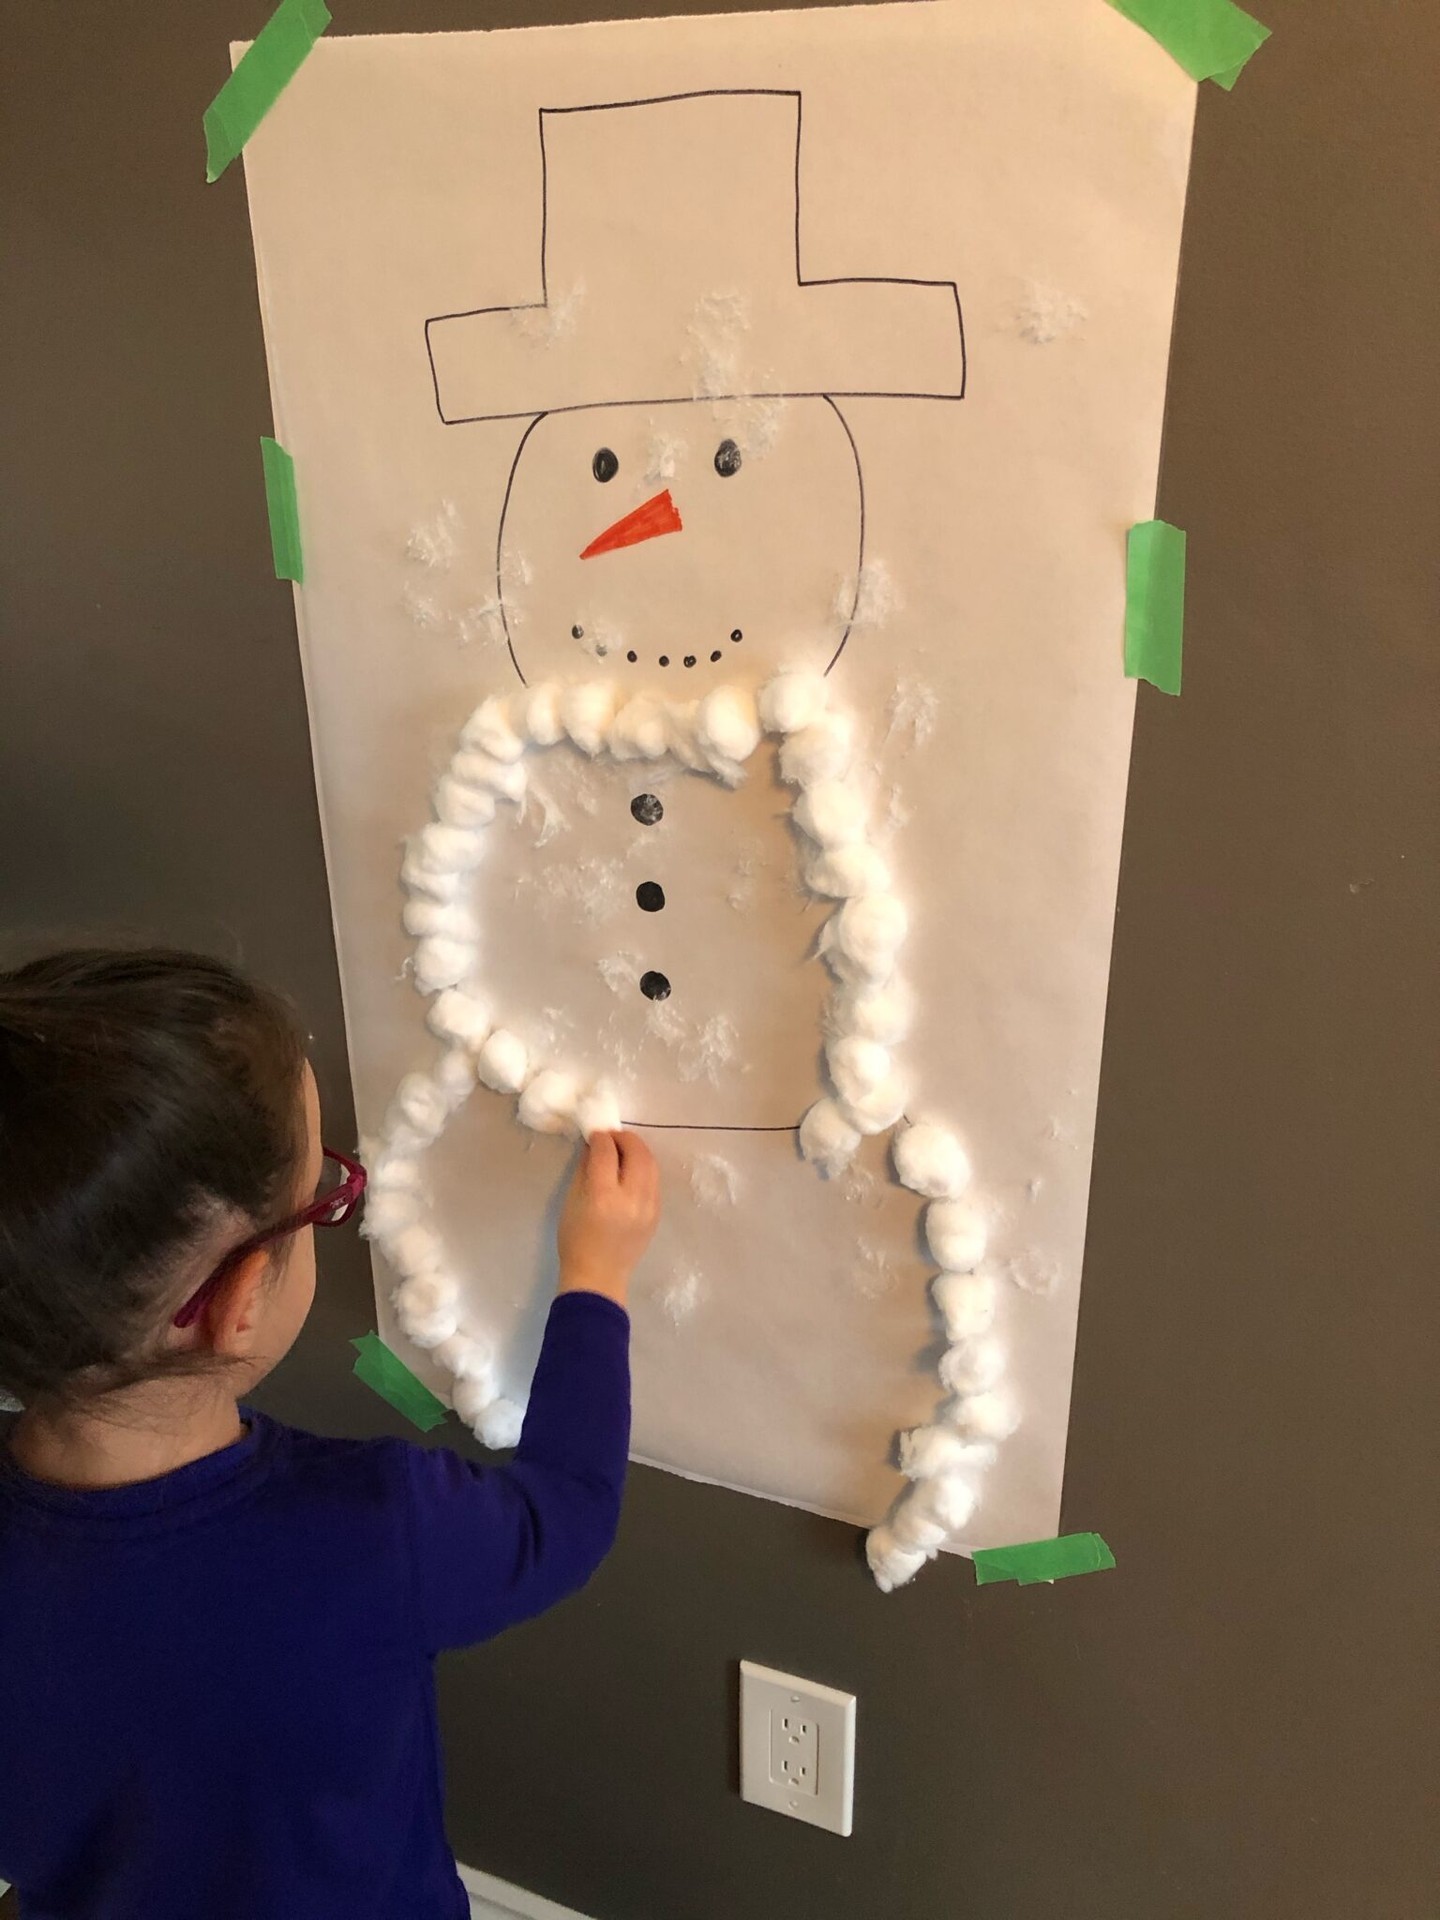
Draw or print a simple snowman outline on a piece of paper or cardstock. Have kids glue cotton balls all over the snowman shape to create a fluffy, textured body. Use markers or cut paper to add facial features, a hat, and a scarf. Glue on buttons using real buttons, beads, or just draw them on. Add stick arms by gluing on actual small twigs or drawing them with markers. Create a winter background by painting or gluing more cotton balls around the page for snow. This is a perfect craft for younger children since it involves simple gluing and develops fine motor skills while being lots of fun.
16. Pinecone Snowman Figures
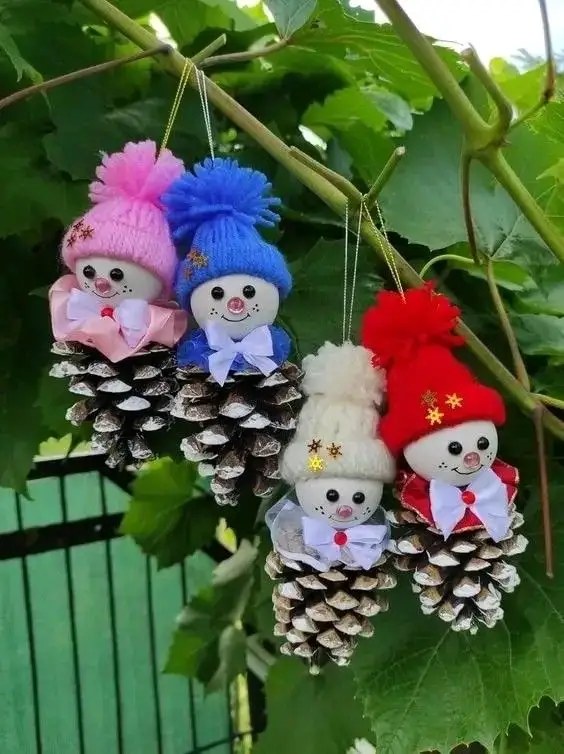
Find pinecones in a round, chubby shape rather than long thin ones. Paint the pinecone white, getting into the crevices as much as possible. Let it dry completely. Glue a small white pom-pom or wooden bead to the top for the head. Add tiny facial features with a marker or paint. Wrap a small strip of felt or ribbon around the middle for a scarf. You can add a tiny hat made from felt on top of the head. Glue on small twig pieces for arms if desired. These natural snowmen bring an organic, woodland feel to your winter decor and look great grouped together on a tray.
17. Paper Bag Snowman Puppets
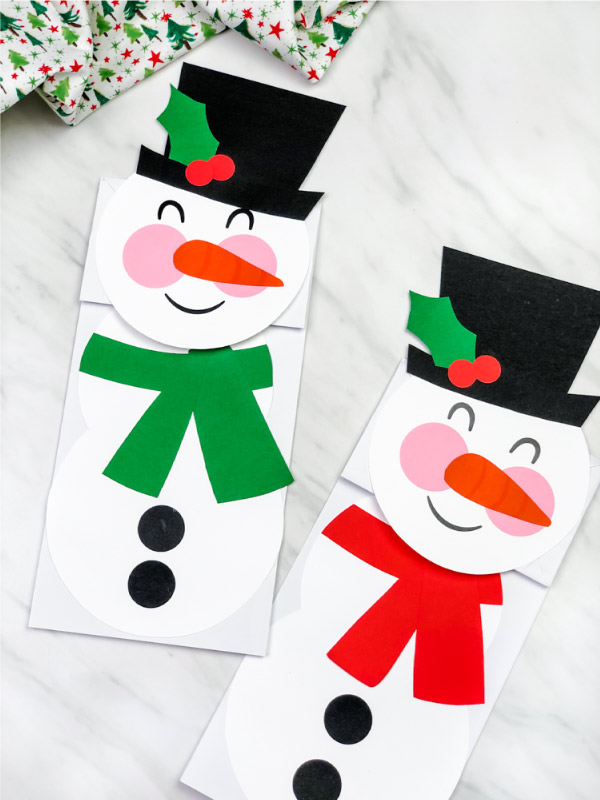
Take a white paper lunch bag and keep it flat with the bottom flap facing up. The flap becomes the snowman’s face. Draw eyes and a mouth on the flap with markers. Add an orange triangle nose. On the body of the bag below the flap, draw or glue on buttons and a scarf. You can add a black paper hat to the top of the bag. Kids can put their hands inside the bag and fold the flap to make the snowman “talk.” These interactive puppets are great for storytelling, putting on shows, or just playing pretend on a snowy day when everyone’s stuck indoors.
18. Button Snowman
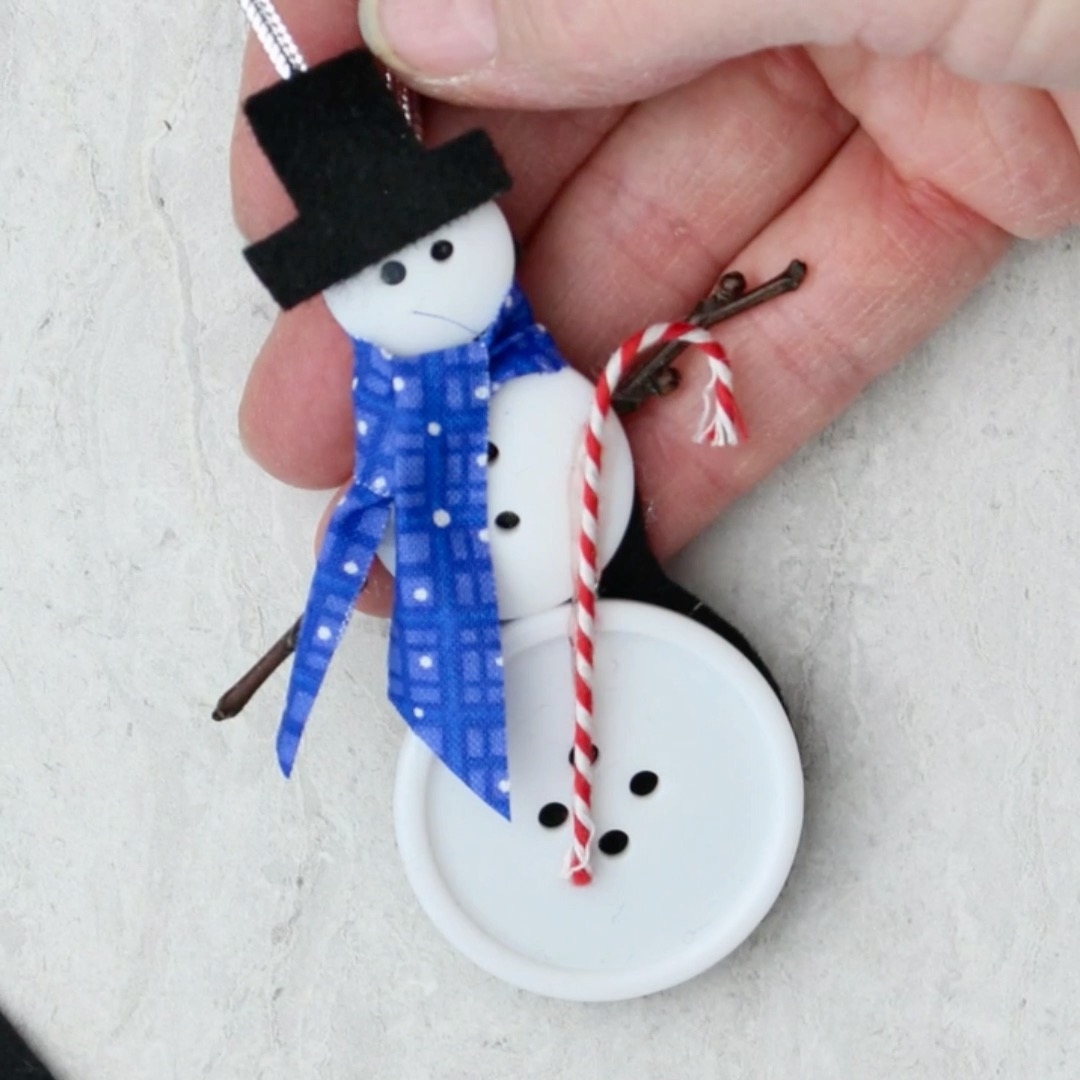
Arrange white buttons in three circles, creating a snowman shape. Glue each button down securely, overlapping them slightly to fill in the circles. Use black thread for the eyes, mouth, and buttons down the body. Create a scarf using ribbon or felt glued across the middle. Use fabric, felt, or more buttons to make a hat at the top. Frame your finished artwork or hang it as is. This craft gives you a chance to use up extra buttons from your craft stash while creating something decorative and dimensional.
19. Foam Cup Snowman Towers
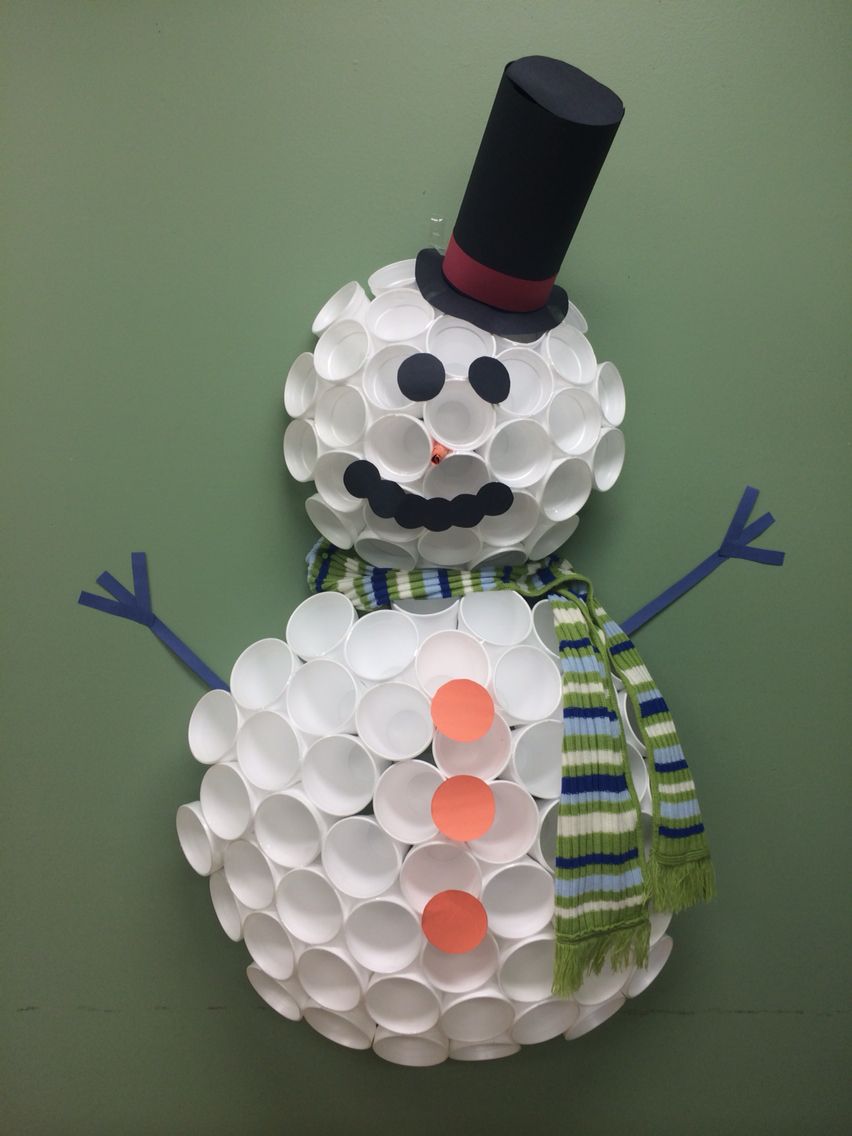
Stack three white foam cups upside down, gluing them together from largest to smallest if you have different sizes. Draw a snowman face on the top cup with permanent markers. Add details like a scarf, hat, and buttons on the other cups. You can also wrap actual ribbon around one cup for a scarf. Glue on googly eyes instead of drawing them if you prefer. Add pipe cleaner or small twig arms poking out from the sides. These lightweight snowmen are sturdy enough for kids to play with and can be made quickly with minimal supplies, making them perfect for classroom parties or group crafting sessions.
20. Clothespin Snowman
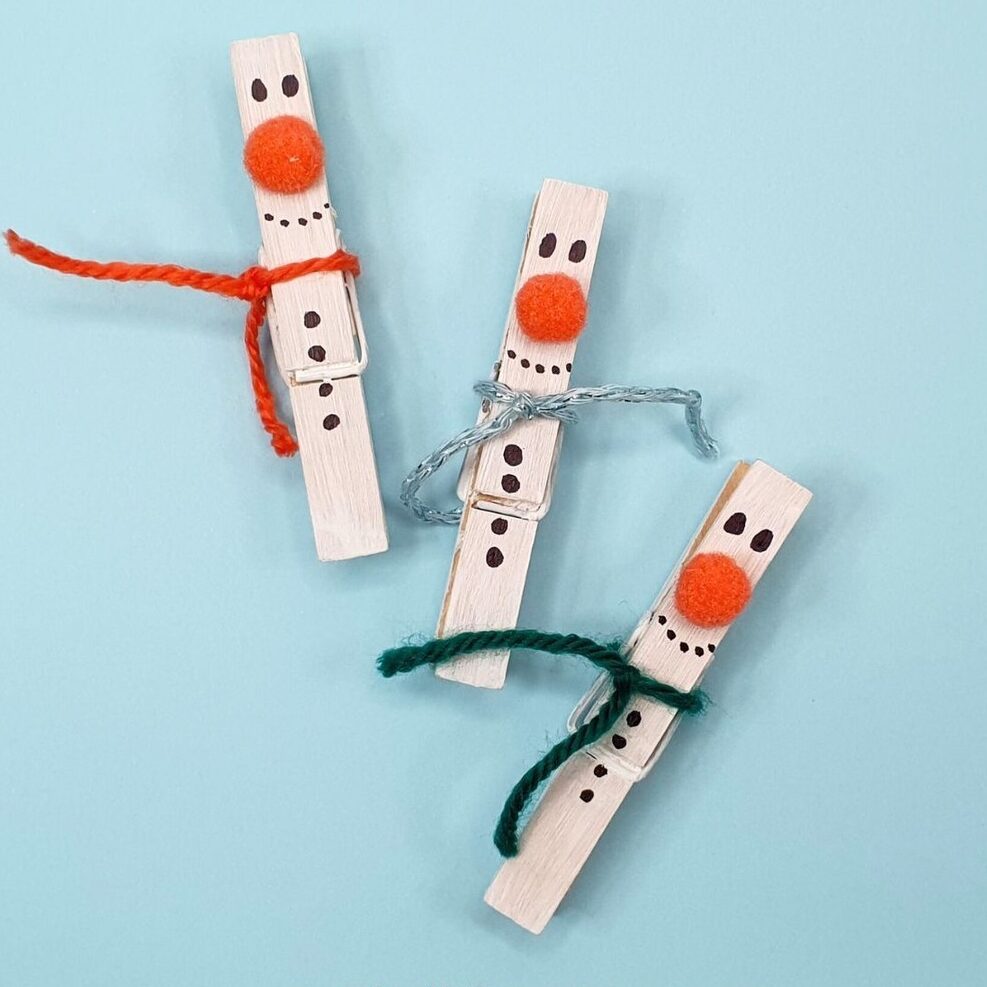
Paint a wooden clothespin white and let it dry. Draw a simple snowman face on the top rounded part with a fine marker. Add a tiny orange dot for the nose. Paint or draw a scarf and buttons on the lower part of the clothespin. You can also add a tiny felt hat or bow to the top for extra decoration. These mini snowmen can hold notes, photos, or artwork on your refrigerator. They also make great package decorations or small gifts for teachers, neighbors, and friends during the winter season.