25 DIY Christmas Village Ideas
Creating your own Christmas village is one of the most charming holiday projects you can tackle. Whether you’re working with materials you already have at home or picking up a few craft supplies, these miniature scenes bring so much personality to your seasonal decor.
You can go rustic with natural materials, whimsical with colorful paints, or elegant with glittery touches. The best part? Each little building tells its own story. Mix and match different techniques, scales, and styles to build a village that feels uniquely yours. Here are 25 creative ways to bring your tiny town to life.
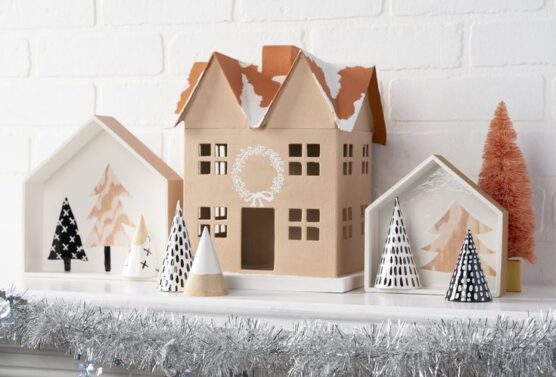
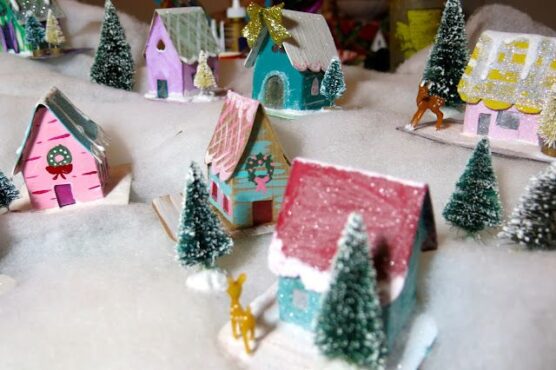
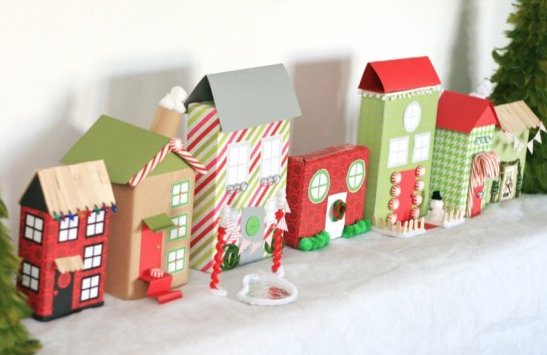
1. Cardboard House Village with Glitter Snow Roofs
These charming houses start with simple cardboard boxes or cereal box cardboard cut into house shapes. Paint the walls in warm colors like cream, soft gray, or brick red, then add windows and doors with markers or paper cutouts. The magic happens on the roofs—brush on white glue and sprinkle silver or iridescent glitter generously to create that fresh snowfall look.
You can add small details like wreaths on doors using green paper circles or draw shutters beside the windows. Line them up on a white cotton batting “snow” base for a cozy village display.
2. Mason Jar Snow Globe Villages with Mini Bottle Brush Trees
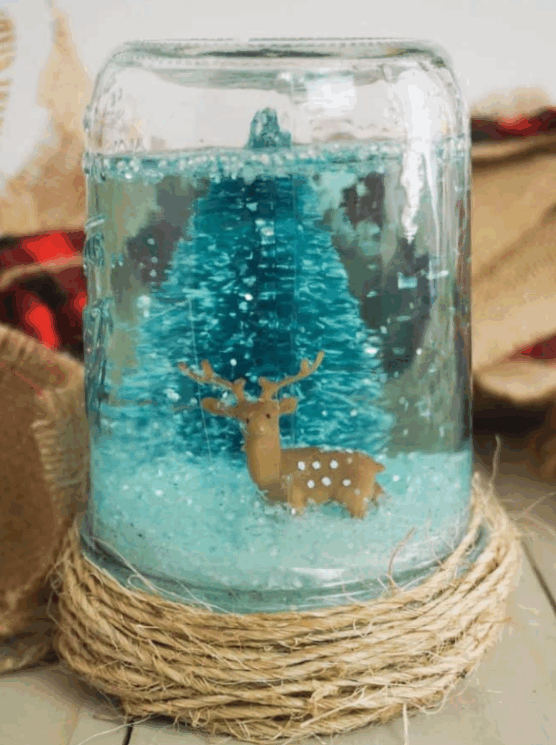
Turn mason jars into individual snow globe scenes by gluing bottle brush trees and tiny houses to the inside of the lid. Use a strong adhesive and let it dry completely before adding the magic. Fill the jar with water, add a spoonful of glycerin to make the snow fall slowly, and drop in white glitter or artificial snow flakes.
Screw the lid on tight and flip it over—instant winter wonderland. These look beautiful grouped together on a mantel, and each jar becomes its own little world. You can use different sized jars for variety.
3. Scrap Wooden Houses Painted in Neutral Colors
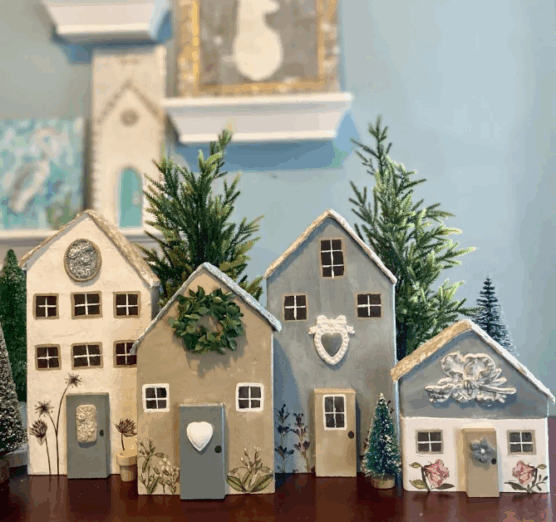
Use scrap pieces of wood to form simple house shapes, sanding them smooth. Paint the walls in soft neutral tones like beige, cream, taupe, or light gray. For the roof, shape air-dry clay into simple triangles or slanted panels, then attach them to the wooden base and let dry.
Add tiny windows and doors with a fine brush or paint pen for charming details. The combination of neutral wood and textured clay roofs creates a minimalist, Scandinavian-inspired village perfect for cozy holiday décor.
4. Paper Mache Buildings
Create charming handmade buildings using paper mache for a cozy, storybook village effect. Make a simple paste from flour and water, then layer newspaper strips over cardboard house shapes or small boxes. Once completely dry and hardened, cut out windows and doors with a craft knife. Paint your buildings in warm, rustic tones, adding details like bricks, shingles, or wood textures for character.
For an added touch, you can place LED tea lights inside to let a soft glow shine through the windows—or display them as-is for a quaint, handmade look. These lightweight houses bring warmth and creativity to any holiday scene.
5. Air Dry Clay Village in Classic White

Create a charming village entirely from air-dry clay for a clean, all-white display. Shape simple houses and cottages with flat bases, adding small cut-out windows and doors before the clay dries. Once hardened, you can paint or leave them pure white for a crisp, minimalist look.
Place battery-operated LED tea lights behind or inside each house to let a soft glow shine through the windows. Group several houses together to form a classic, serene winter village perfect for mantelpieces, shelves, or centerpieces.
6. Felt Gingerbread House Village

Cut house shapes from brown felt and decorate them like gingerbread using puffy fabric paint or regular fabric paint in white and pastel colors. Add “icing” details along the roof edges, draw candy decorations, and create colorful gumdrops with small felt circles.
Use fabric glue to attach the sides together or simply lay them flat as dimensional decorations. These soft houses are perfect if you have kids or pets since there are no sharp edges or breakable parts. Plus, the felt gives them a cozy, textile quality that feels warm and inviting.
7. Christmas Village Wreath
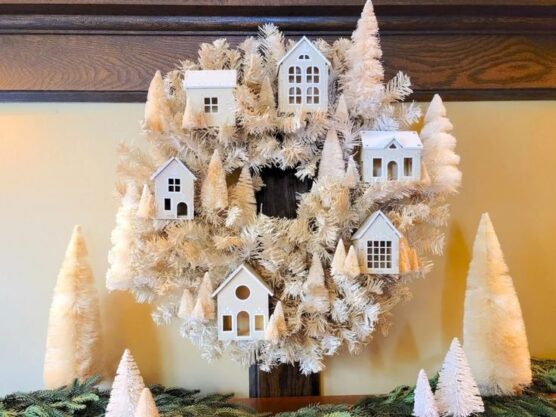
Create a miniature village wreath using a circular base, like foam or sturdy cardboard. Arrange small handmade houses and trees, made from cardboard, wood scraps, or air-dry clay, around the base to form a charming village scene. Weave in faux white greenery to resemble snowy branches, adding texture and a wintry feel.
Paint the buildings in soft neutrals or muted festive tones, and add tiny drawn or painted windows and doors for detail. Hang this wreath on a door or wall for a whimsical, snowy village display that’s both unique and cozy.
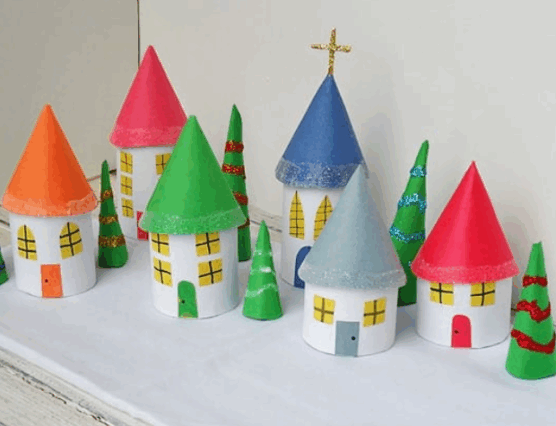
8. Painted Terra Cotta Pot Houses Stacked Upside Down
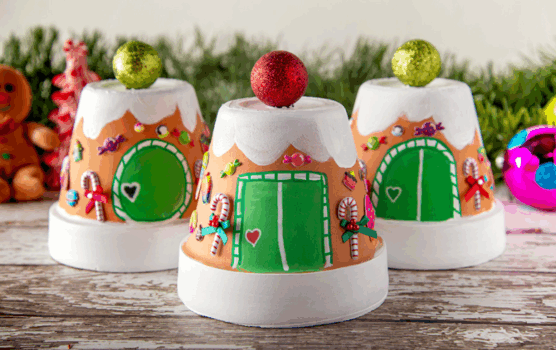
Flip small terra cotta pots upside down and suddenly they look like little buildings. Paint them in cheerful colors—reds, whites, greens, and blues work beautifully. The drainage hole becomes a chimney, which you can highlight with paint or leave natural. Stack different sized pots to create townhouses or multi-story buildings, securing them with strong glue.
Add windows and doors with acrylic paint or stickers. Place them on a tray with fake snow and bottle brush trees. The natural texture of the terra cotta gives these houses a charming, cottage-like appearance.
9. Tiered Village Advent Calendar

Create a tiered village display using cardstock, craft paper, or scrap paper to make small house shapes. Cut simple house templates, trace them onto your chosen paper, then fold and glue the edges to form standing 3D houses. Arrange them on stacked trays, shallow boxes, or wooden risers to create multiple levels.
Leave the paper plain for a neutral, minimalist look, or add soft watercolor washes for subtle color. Add tiny LED lights or fairy lights behind the houses to let the paper glow gently, creating a cozy, layered advent village.
10. Recycled Birdhouse Village
Transform small birdhouses into a charming recycled village. Paint or decorate each birdhouse in soft, neutral, or pastel tones, then add details like windows, doors, and roof accents with paint, paper, or thin cardboard.
Arrange them together on a tray, shelf, or mantel to form a quaint village scene. This approach is easy, eco-friendly, and kid-friendly, creating a playful, handcrafted village without the need for constructing walls from sticks.
11. Juice Carton Village Houses Covered in White Paint
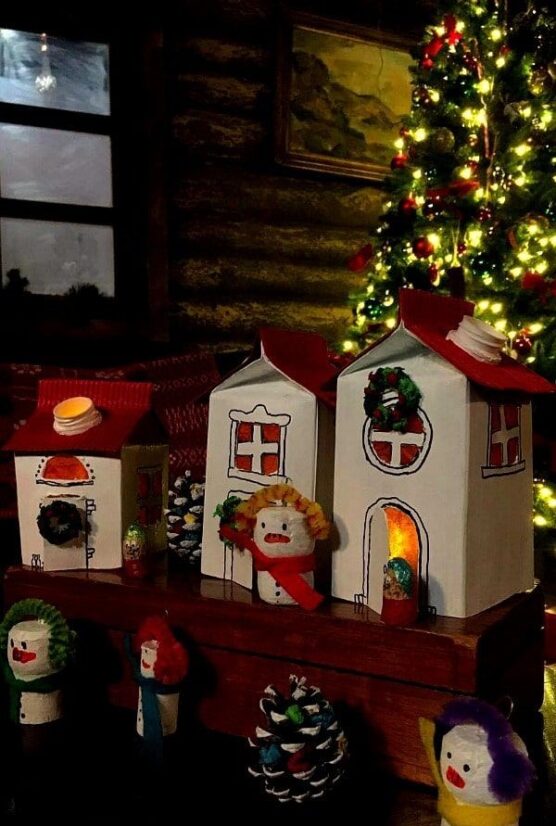
Rinse out juice cartons thoroughly and let them dry completely. Cut them to different heights for a varied village look. Cover the waxy surface with a layer of white acrylic paint or gesso, adding a bit of glue to help it adhere. Once dry, you can leave the houses classic white for a minimalist winter village or add subtle details like painted rooflines, windows, or textured walls.
The naturally peaked tops of the cartons create perfect roof shapes, making this an easy, beginner-friendly project for a charming holiday display.
12. Wooden House with Pastel Colors
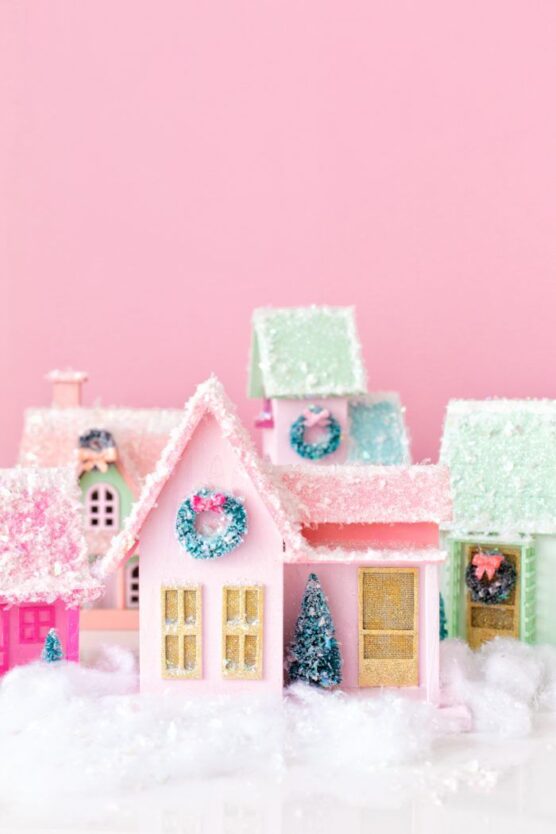
Paint small wooden house shapes in soft pastel shades like blush pink, mint green, powder blue, or lavender for a sweet, whimsical village. Add roofs and base details with matching or complementary pastel tones, then sprinkle faux snow over the roofs and around the base for a cozy, wintry effect.
These charming houses work beautifully as a playful, pastel holiday display, perfect for shelves, mantels, or as part of a larger miniature village scene.
13. NYC Inspired Christmas Village

Create a miniature NYC-inspired village using small cardboard, wood, or clay buildings painted in neutral or muted tones for a sleek city look. Skip the fences and trees; instead, add tiny sidewalks, roads, or plaza details with paper, paint, or foam to define pathways and public spaces.
Arrange the buildings on a flat base in clustered city blocks to mimic a bustling urban layout. The minimalist approach highlights the architectural shapes and gives a modern, metropolitan feel to your holiday display.
14. Salt Dough Buildings with Textured Details
Mix up salt dough using flour, salt, and water, then roll it out and cut house shapes using templates. Before baking, press textures into the dough with toothpicks, forks, or lace to create brick patterns, roof shingles, or decorative details. Bake according to your recipe until hardened.
Once cool, paint them in traditional Christmas colors or go with a more neutral palette. Seal with clear acrylic sealer to protect the paint. Salt dough has a lovely matte finish and vintage quality that makes your village look like treasured heirloom pieces.
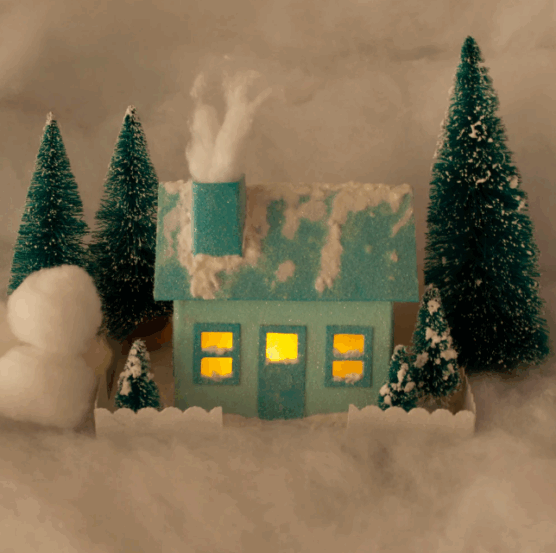
15. Vintage Putz House
Create a charming miniature Putz-style house reminiscent of classic holiday decorations. Build the structure from cardboard, cardstock, or thin wood, then cover it with paint, glitter, or faux snow for a festive touch. Add tiny windows, doors, and roof details using paper, paint, or foil.
Place a battery-operated LED tea light inside to let the windows glow warmly. These houses are perfect for mantels, shelves, or tabletop village displays, capturing the nostalgic charm of vintage holiday décor.
16. Clay Polymer Miniature Village Scene
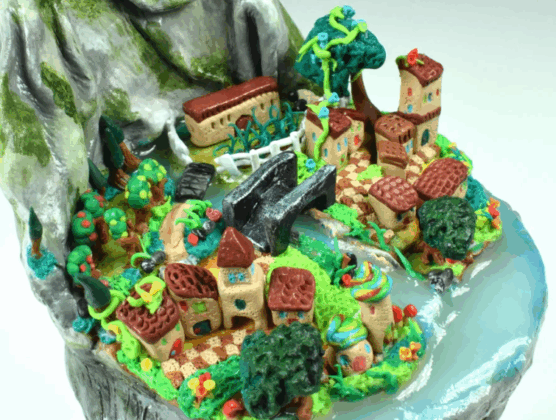
Use polymer clay like Sculpey or Fimo to hand-sculpt tiny buildings with incredible detail. Roll out walls, shape roofs, and add texture using clay tools or household items like toothbrushes for stucco or combs for shingles. You can create Tudor-style houses with dark beam details, stone cottages, or brick shops.
Bake according to package directions to harden, then paint details if desired. Polymer clay holds fine details beautifully and creates durable pieces. Make tiny doors that open, chimneys with texture, or even miniature people to populate your village.
17. Minimalist Cardboard Village with LED Tea Lights
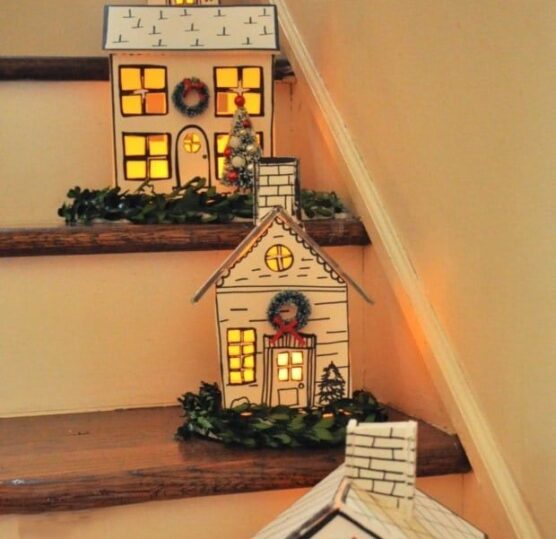
Create a serene, minimalist village using simple cardboard house shapes painted white for a clean, modern look. Cut out windows and doors, then tuck in battery-operated LED tea lights to let a soft glow shine through.
Arrange the houses on a staircase, tiered trays, or flat surface for a layered display that works from multiple angles. The all-white palette and subtle lighting give a calm, Scandinavian-inspired aesthetic, perfect for understated holiday décor.
18. Upcycle Old Pages into Houses

Transform old pages into charming village houses by wrapping or adhering them onto small ceramic houses. Cut vintage or printed pages to fit each surface, then glue them in place for a textured, literary look. Add subtle details with paint or ink to highlight windows, doors, or rooflines.
Arrange the ceramic-based houses on a flat surface or tray, then enhance the display with faux snow, miniature trees, or tiny figurines. This approach gives a dimensional, storybook village feel without needing stacked books, creating a cozy, eye-catching centerpiece.
19. Cereal Box Churches and Town Halls
Cereal boxes are the perfect size for larger village buildings like churches and town halls. Cut and fold them into taller structures, adding steeples made from cardboard cones or pointed roofs. Cover the boxes with paint or paper and add impressive details like arched doorways, clock towers, or bell towers cut from additional cardboard.
Paint windows with stained glass effects using translucent craft paint. These larger buildings become focal points in your village, and their scale makes them easier to decorate with detailed painting. They anchor your scene and give it a proper town square feel.
20. Glass Jar Cloche Individual Building Displays
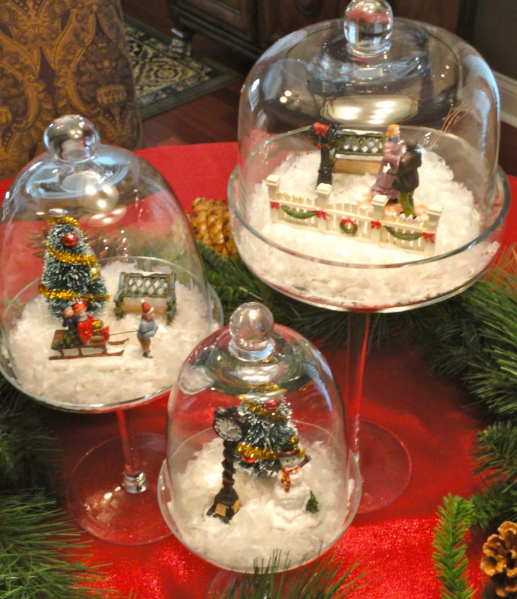
Give each special house its own spotlight by placing it under a glass cloche or dome. Set the house on a small wooden base or thick cardboard circle, surround it with fake snow or cotton batting, add a tiny bottle brush tree, and cover with the cloche. This creates individual snow globe-like displays without the water.
Each building becomes a protected little vignette that you can place around your home. Use varying heights and sizes of cloches for visual interest. These look especially elegant on a mantel or as a centerpiece.
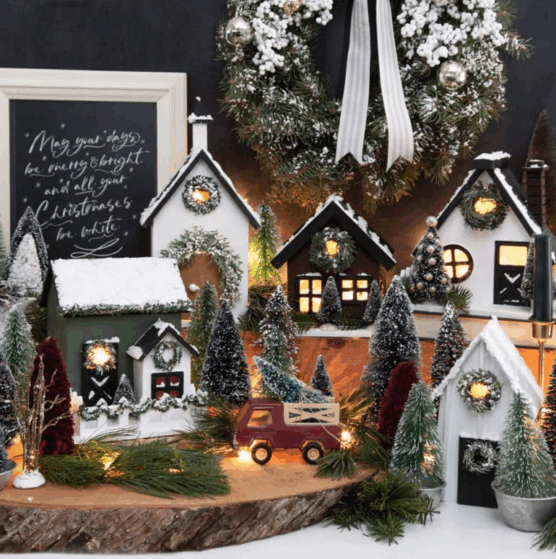
21. Painted Wooden Craft Houses with Snow Texture Paste

Start with pre-made wooden craft houses from hobby stores. Paint them in rich, deep colors like burgundy, forest green, or navy blue. Once dry, use texture paste mixed with white paint to create dimensional snow effects on the roofs and around the base. Apply it with a palette knife for realistic snow drifts and icicles.
Add fine glitter while the paste is still wet for sparkle. Paint the windows bright yellow to suggest light glowing from inside. These look professional and polished, perfect if you want a more sophisticated village display.
22. Cardboard Roll Buildings with Paint and Trim
Turn empty cardboard rolls into charming village buildings. Cut openings or use the natural tube ends as doors or windows, then paint each roll in solid colors. Add architectural details with ribbon, paper strips, or washi tape for window frames, rooflines, or trim.
You can make fancy Victorian-style houses with layered details or keep it simple with minimalist cottages. The cylindrical shape works beautifully for unique, whimsical village layouts, and a group of painted rolls creates an impressive, handcrafted display in no time.
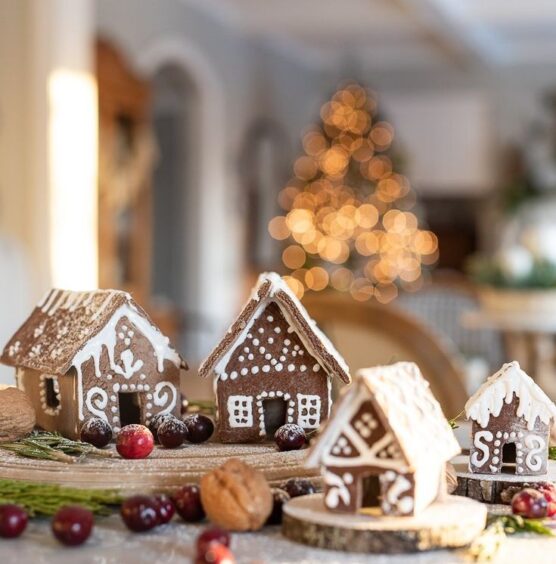
23. Gingerbread Foam Board House
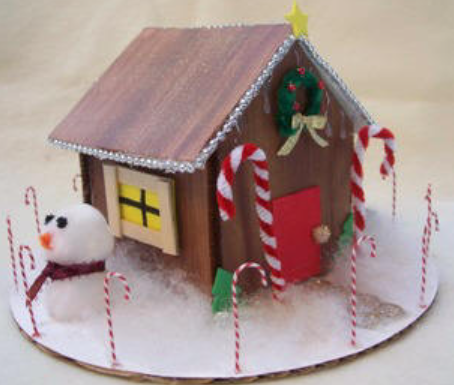
Build a charming 3D gingerbread-style house from foam board for a sturdy, festive display. Cut out two side walls, a front, a back, and two roof panels using a simple house shape, no templates needed, just straight lines and a peaked roof. Assemble the pieces with hot glue or craft glue to form the house.
Paint it in warm brown tones to resemble gingerbread, then add white painted lines for icing-style trim around the roof, windows, and door. You can sprinkle a little glitter over the paint for a frosted effect. This easy, dimensional house makes a cozy centerpiece or a sweet addition to your handmade holiday village.
24. Miniature Village on Tiered Tray Stands
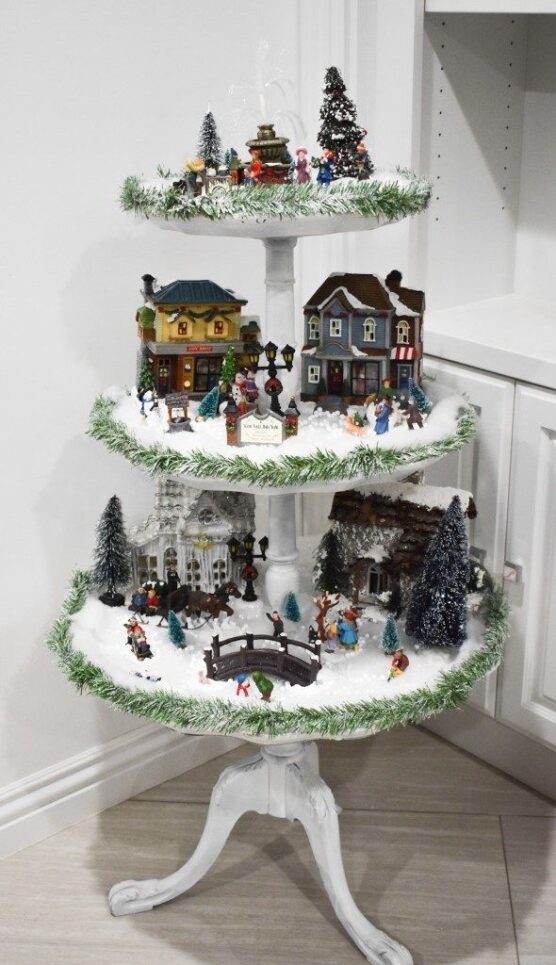
Build a charming miniature village using stacked trays or shallow bowls instead of cake stands. Arrange them at different heights using sturdy boxes, books, or wooden risers hidden beneath a layer of fabric or faux snow. Place larger houses and trees on the bottom tray, medium ones in the middle, and tiny cottages or figurines on top for a tiered look.
Weave LED string lights through the setup and sprinkle faux snow across each level for a wintry glow. Add touches of greenery or beaded garland around the edges to complete your cozy, multi-level village display.
25. Shadow Box Framed 3D Village Scene

Create a village scene inside a deep shadow box frame for a piece of wall art you can enjoy year after year. Build or arrange small flat-backed houses inside the box, layer them front to back for depth, and add cotton snow at the bottom. Include miniature trees, tiny figurines, and perhaps a string of micro LED lights.
You can paint a winter sky backdrop on the back of the box. Hang this on your wall or prop it on a shelf. The frame keeps everything protected and dust-free, and you can create a different scene each year if you want.